Having a hard time locating your MacBook photos or simply frustrated that these are not arranged chronologically? This would not be a problem if you’ve only got a dozen or so images saved. But if you consider your MacBook as a personal photo repository, then organizing is a must.
No worries, it is rather a quick fix – if you know what you’re doing that is. Follow this quick and simple steps to change the date and time of these MacBook photos so you can locate your favorite photos easily.
Viewing Time and Date for Macbook Photos
Select an image, double-click on it to view its date and time.
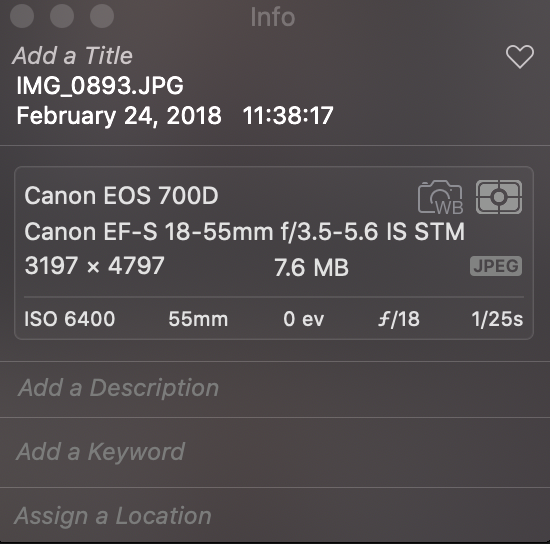
You can also highlight an image and press ‘Cmd + I’ to view its metadata. Metadata contains information such as the date and time it was created, camera settings, where it was taken, and more.
Selecting ‘Photos” from the sidebar in the Photos app displays your entire library in chronological order. Check if any photos are out of place or are not supposed to be located within a certain timeline. Another thing you would notice is that out-of-place photos are grouped.
How to Change Time and Date Settings
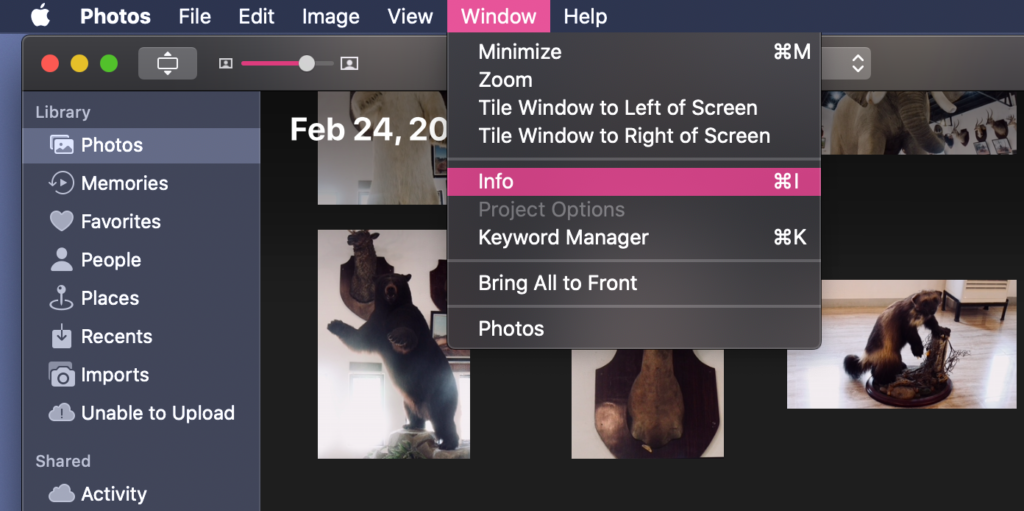
Step 1: Go to Photos and click on ‘Window’ on the Menu Bar
Step 2: Select any photo and a pop-up window will appear containing the details about the photo including the date and time
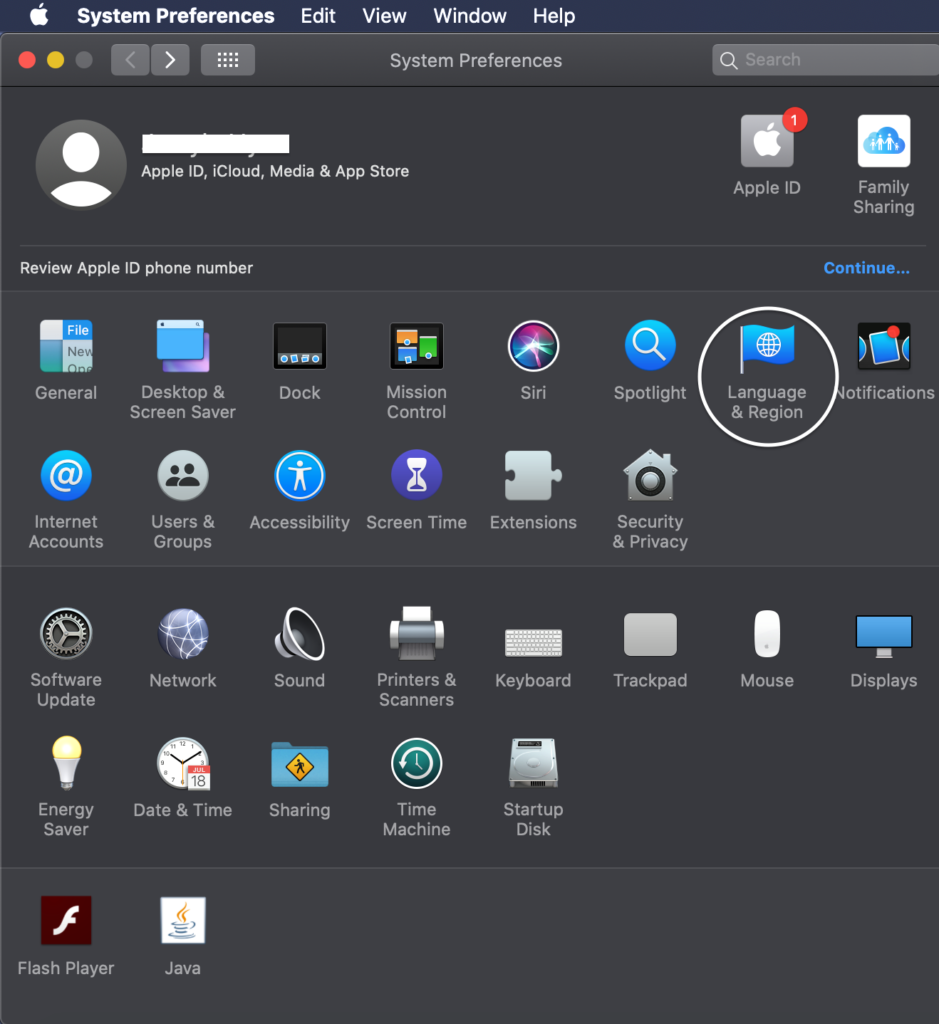
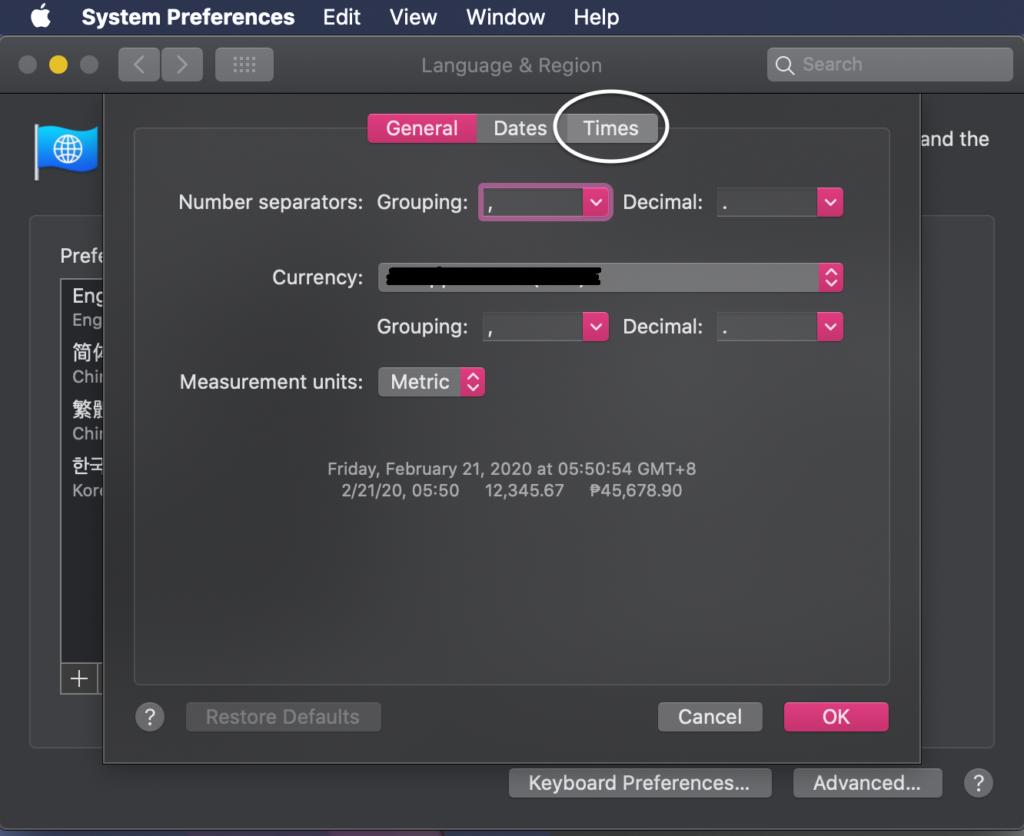
Step 3: Go to System Preferences and select ‘Language & Region’
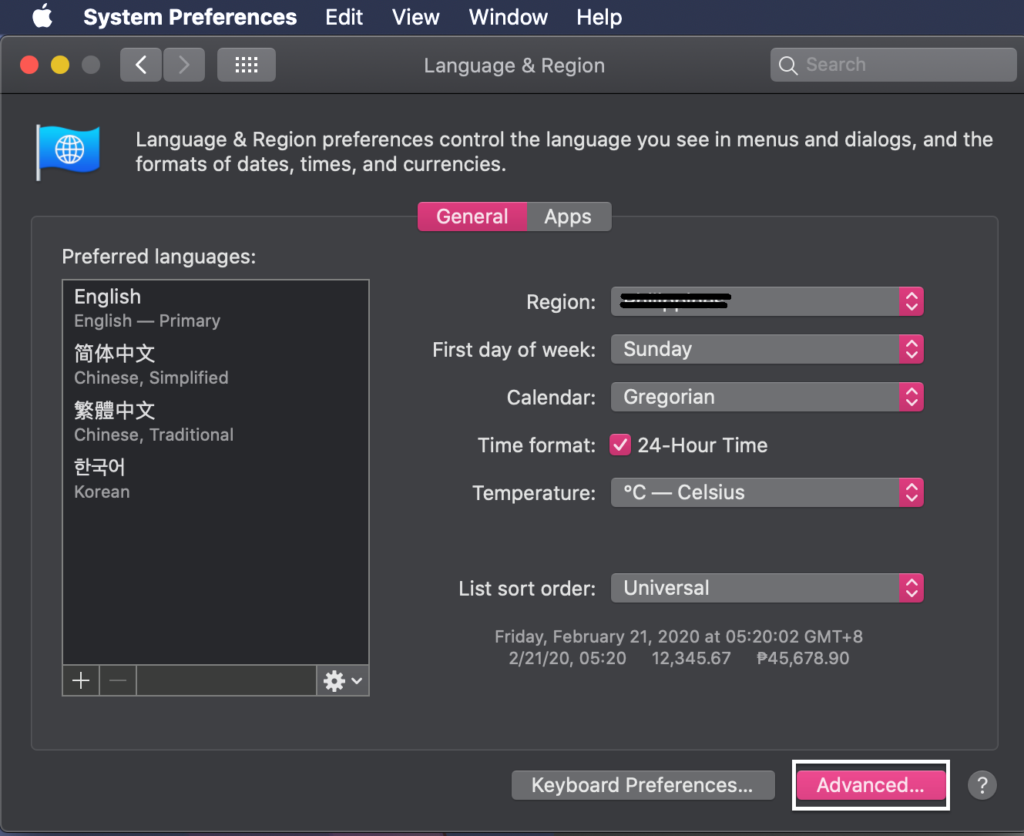
Step 4: Click ‘Advanced’ located at the lower right of the window
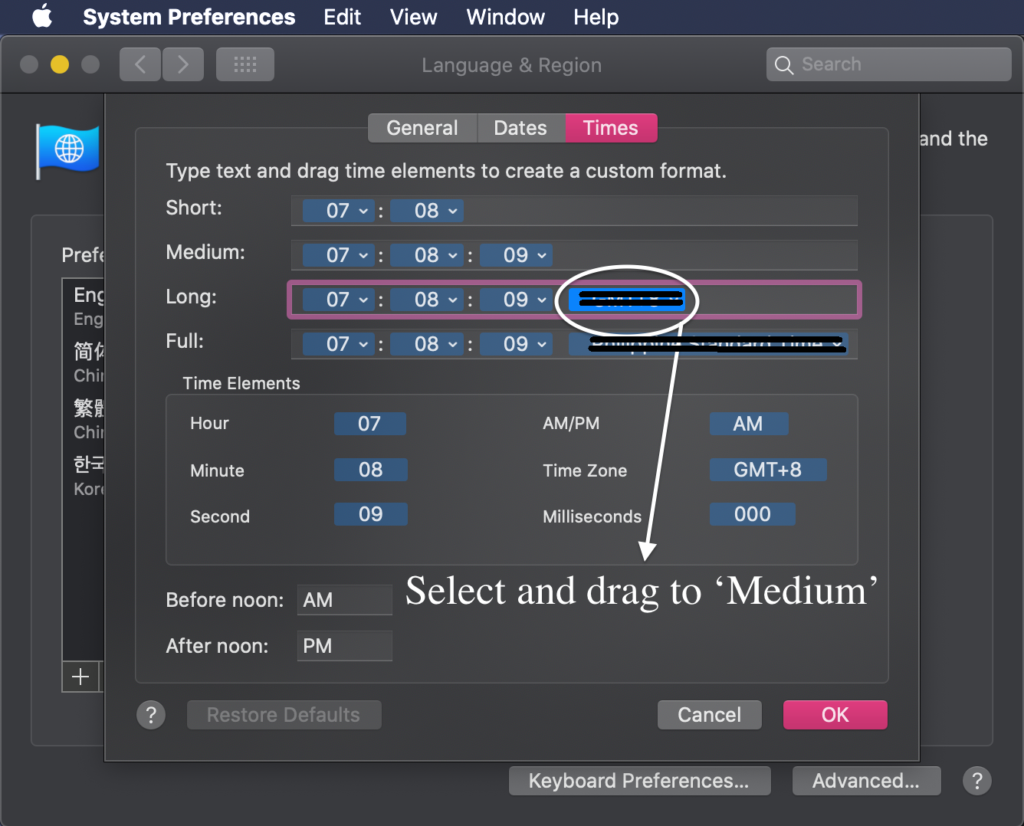
Step 5: Another pop-up window will appear. Select ‘Times’
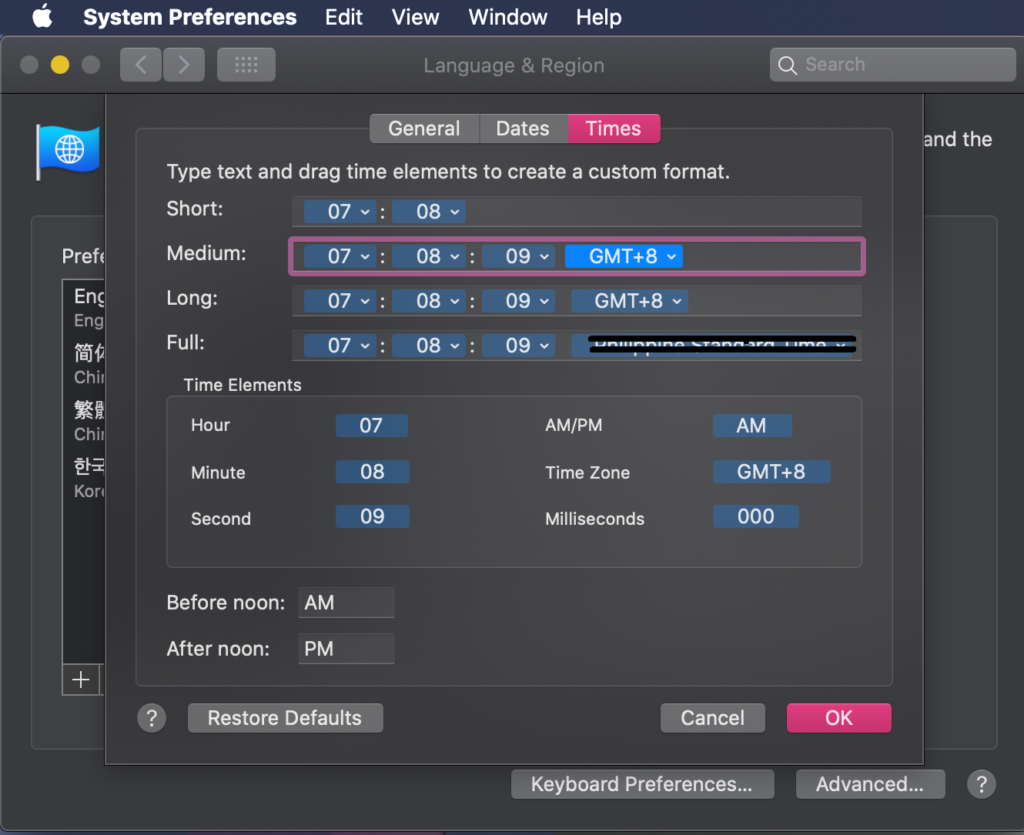
Step 6: Select your Timezone
Step 7: Click ‘OK’
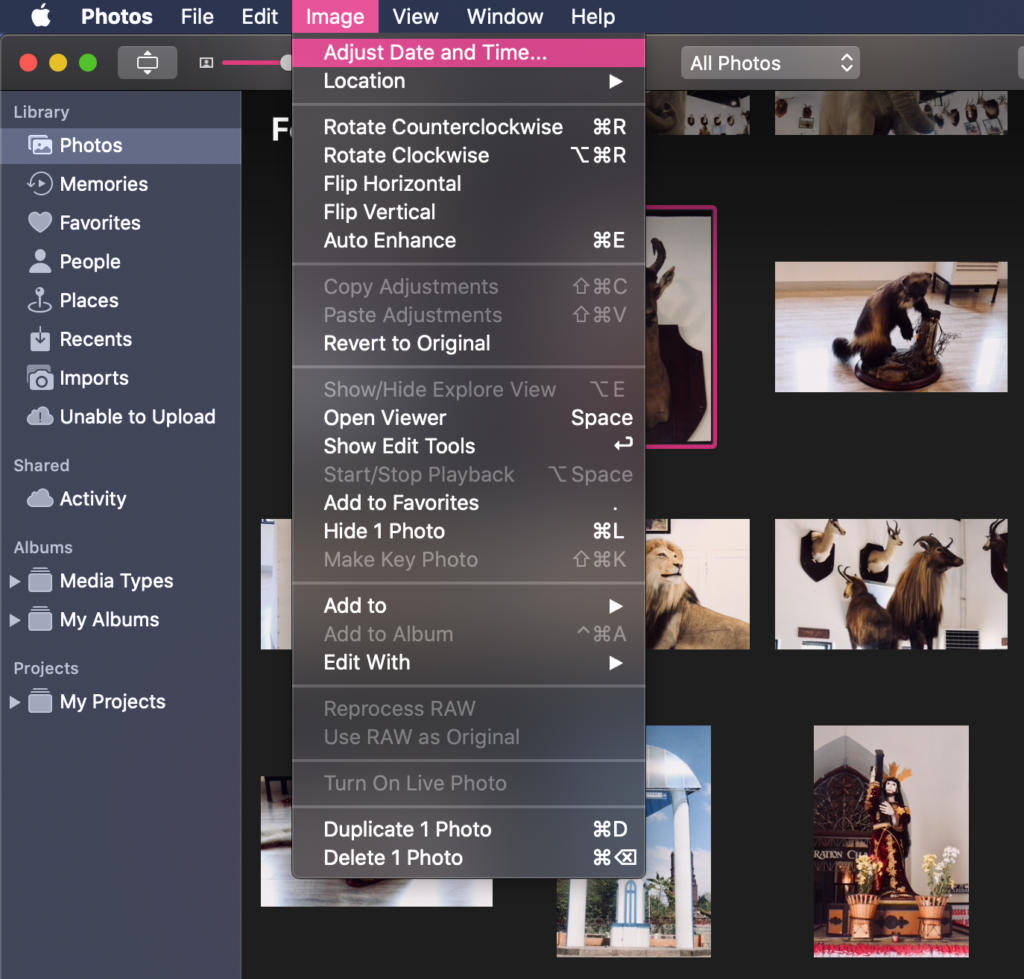
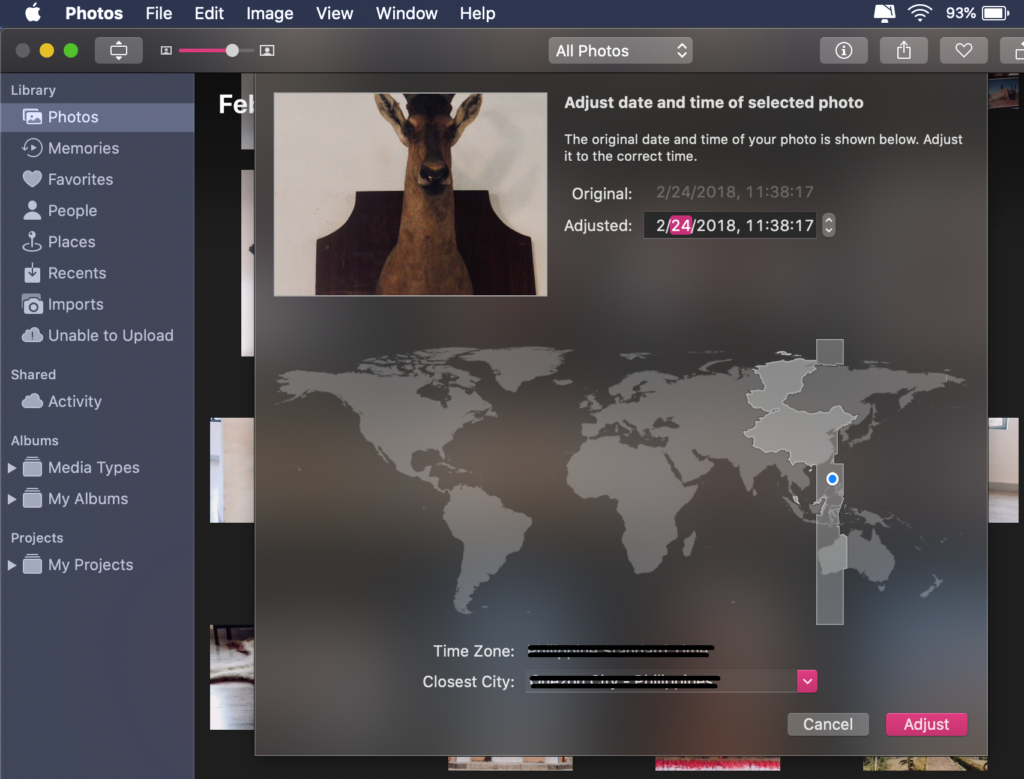
Step 8: Go to Photos and select the photo you want to adjust the date and time. On the Menu Bar, select ‘Image’ and a drop-down list will appear. Select ‘Adjust Date and Time‘.
Step 9: A pop-up window will appear containing the original date and time of the photo and under the ‘Adjust’ you can now adjust the date and time of the photo.
How to Search for Photos
The Photos app makes searching for photos of a person, place, event, or thing a breeze.
Tap the Search tab and enter your search term (person, place, etc.) in the search bar. This is located in the upper-right corner of your MacBook.
People. Organize your photos by keeping the names and faces in your People album. This makes it easier for you to find a specific person or group of persons.
Places. Type the location in the Search bar to see all photos and videos associated with the place. You can also locate all these photos and images on a map in Places.
Things. It is possible to find photos of things and scenes. Search for a specific object like a ‘car’ and then select a category to get all related results.
For more MacBook tips and tricks, you can also visit our YouTube channel here.











0 Comments