 Diane
Diane


Calls, particularly video calls, are the most popular source through which we can easily communicate with our loved ones who are far away. It is considered as a default option now to make calls as everyone has access to Wi-Fi or cellular data. There are many tools accessible to connect us to anybody all over the world. Regardless of whether it is related to personal or official work, you can communicate with them through Facebook, WhatsApp, Telegram, Skype, Google Meet, Slack, Zoom, and many more. All these applications offer great quality sound and video calls for free or for minimal cost.
For almost 10 years, there has been another application named FaceTime which is consistently at the top for iOS and macOS clients. FaceTime call is an incredible method that helps you to keep in contact with individuals you care about, regardless of whether on an iOS gadget or a Mac. If you want to preserve the special moments with your loved ones, you can even record FaceTime on your Mac or an iPhone.
In this guide, we’ll show you a step by step process through which you can easily use the screen recording feature of your macOS system to record the calls.
Why Should You Use the FaceTime App?
There are many reasons why Facetime has become so popular these days. Firstly, the FaceTime App utilizes full end-to-end encryption for all calls. This means that you can get the maximum level of security and privacy as compared to other apps. Secondly, this app is free and comes pre-installed on your iPhone, iPad, and Mac. Thirdly, the FaceTime app which is designed by Apple itself doesn’t consume more space in the storage. It is less than 1MB on iOS. You can make full use of its functionality without any hindrances. Lastly, this app is very simple to use and can handle up to 32 people in a video or audio call conference. This is fascinating and truly quite useful.
So if you haven’t used it yet, you better try it and enjoy its features. On the other hand, for those who have already used it, and want to know if there is an option to record your calls, you are at the right place. We will discuss now how you can do it.
How to Record FaceTime Calls on your Mac through QuickTime:
You need to follow these steps in order to record Facetime calls on your Mac by using quick time.
- Firstly, you need to Launch QuickTime from the Applications folder on your Mac.
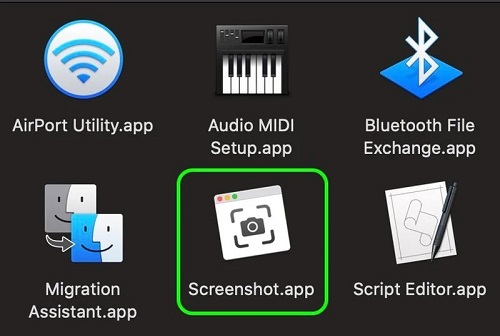
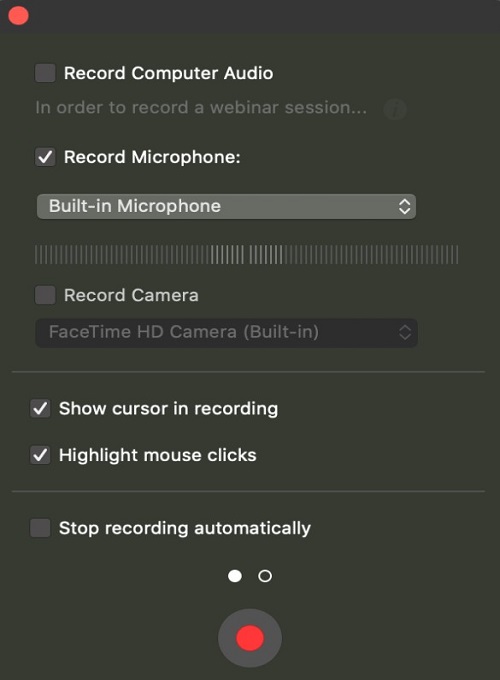
- Then go to the File section where you will see New Screen Recording in the menu bar. You can also use an alternative method by launching the macOS screenshot app from the Application folder or by pressing Shift + Command + 5 from anywhere on your Mac.
- After clicking on it, you will select Record Entire Screen or Record Selected Portion. Also, keep in mind that you have to keep your FaceTime window within the frame at the same time.

- Click to start recording the call.
- Click on the stop icon in the menu bar to end your recording.
How to Record FaceTime Calls on your Mac by Using Capto:
You can also use other apps that are available on macOS like Capto. Capto is a very simple yet powerful screen recorder. It even lets you edit and share your calls in a minute. QuickTime is mostly a player that has some recording functionality whereas Capto has been designed to handle video recordings and many more tasks. To do a FaceTime recording via Capto, you have to follow these steps.
- First, you need to Launch Capto from Applications.
- Then you have to click on Record Screen or Area in the app’s toolbar. The other alternative way is to select the Capto icon in the menu bar and choose Record Fullscreen by pressing Option + Command + 3 or Record Area by pressing Option + Command + 4.
- Check all the appropriate options and then click to continue. You can also hide your desktop icons or even replace it with a custom image from the options.
- Now drag so that you can expand the recording area to fit the FaceTime window. Next click on the recording icon.
- After you are done with it, you will go to Capto in the menu bar and click on stop & Save Recording. You can also press Shift + Command + Esc.
How to Record FaceTime Calls from your iPhone, iPad, or iPod by using Mac:
You can also use your Mac to record the facetime calls from your other IOS gadgets. The steps are almost the same. All you have to do is to select New Movie Recording from the menu bar and then choose your iPhone, iPad, or iPod.
- You have to connect your iPhone, iPad, or iPod to your Mac with the cable.
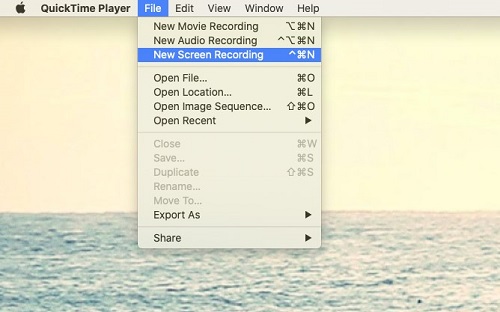
- Next is open QuickTime on your Mac from your dock.
- Then go to File and click on New Movie Recording in the menu bar.
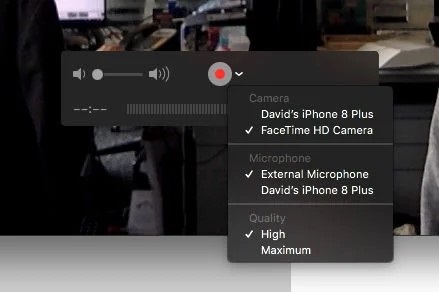
- Click on the arrow next to the record button and choose your iPhone or iPad.
- Now unlock your iPhone, iPad, or iPod touch and you will see its display will be shown on the QuickTime on your Mac.
- You have to keep Mac’s volume bar high so that you can clearly record all the voices.
- You have to press QuickTime’s red recording button before you start or accept the call.

- The recording button will turn gray when it starts recording your device’s screen and audio. You also see the file size will increase over time.
- The next step is to launch FaceTime on your iDevice to place a call or accept it.
- To finish the call, you have to exit the call on your iDevice and then press the gray recording button on your Mac
- QuickTime will then automatically create a video file. You have to save it in the File menu and rename it.
How to Record FaceTime Calls on iPhone/iPad:
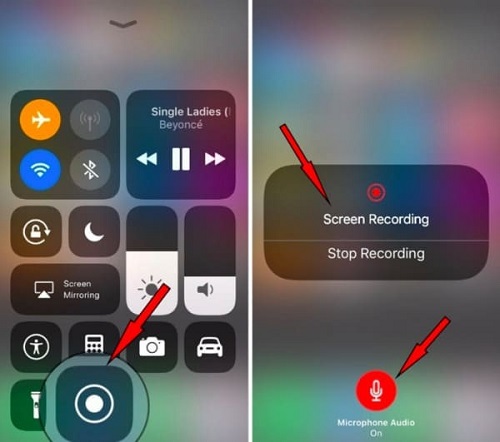
What will you need to record the FaceTime calls on your iPhone or iPad? A screen-recording feature was added to the Control Center in iOS 11 which helps the users to do it. So first you need to check that the record button should be present in your Control Centre. If it is, then start by swiping up from the bottom of the screen and click on it.
If it’s not there then you need to go into Settings and click on Control Centre. From the list, you will see customize Controls, click on it. Then scroll down and tap the green plus sign next to Screen Recording. Now you are ready to record the screen from the Control Centre. After this, follow these steps to record the video part of the FaceTime call.
- You will open the Control Centre from your iPhone and then tap on the screen recording icon.
- You’ll see a three-second countdown after clicking on it. Then a red bar at the top of the screen will appear that indicate that it’s being recorded
- Now start your FaceTime call.
- Once you are done, again open the Control Centre and tap on the recording icon one more time to stop the recording. Your video will then be saved in your Gallery.
- Sometimes by default, the microphone is off when you press the screen recording button. So, you need to see that before recording the call. To turn it ON, you have to long-press on the screen recording icon. It will then give you an option to activate the device’s microphone.
What if you just want to Record Facetime with Audio?
There are times when you have to only record the audio of a phone call. For that, there is third-party software that will help you to record the audio-only. Those apps include:
-
Audio Hijack
This is a well-known application for podcasters as it has a very easy process of recording. You can pick which application you want to record in the audio form, including Skype, Hangouts, and Safari.
-
FonePaw Screen Recorder
FonePaw’s Screen Recorder can be the most ideal alternative if you are presenting during a meeting. This application permits you to record the call, as well as also record your desktop simultaneously.
-
Snagit
Snagit is accessible for both Mac and Windows. You can make recording templates and can even use it to comment on screenshots. Thus, it can do many more things than providing only screen recordings.
Is it Legal to Record a FaceTime Call?
It is okay to record a Facetime call if both parties have consent. But if you haven’t taken the consent from the other party, then it depends on where you are and the person you are recording. So, for that, you have to check the laws in your country. In England and Wales, you can secretly record a call with someone if it’s for your own use only. But if you wish to share it with a third party, then you need to notify them or have their consent before. Otherwise, they can take legal action against this.
Conclusion:
Regardless of where you are, it is extremely easy to record video and audio calls from your Mac or iPhone. We have mentioned the steps through which you can save precious moments with your loved ones. You can either use QuickTime from Mac or you can use third-party software for this process. It is also very crucial to notify or take consent from the other party before you intend to record the call. Many countries have specific laws regarding recording without taking permission from the other. So you should know the laws too. However, you will not have any problems as long as you stay within the law of your country.
 Adrienne Blanier


 Adrienne Blanier

 Ronald Uy


 Leah H. Blanchard


0 Comments