 Diane
Diane


If you want to enhance your work productivity, like making Zoom conference calls and showcasing your hard work to your online team simultaneously or comparing critical data, then having a dual monitor setup is a must.
Having a dual monitor setup for your Macbook Pro or Air would increase your productivity as well. This setup makes it easier to organize your desktop and gives you that extra real estate to view all your work. A dual monitor setup for MacBook Pro allows you to seamlessly switch from one screen to another, giving you better control of what you can see.
Things to Check when Planning a Dual Monitor Setup for MacBook Pro
Connecting non-apple devices, in general, has always been a problem for Mac users. This is why it is recommended that MacBook users use only certified Apple accessories.
Check your Ports
The first thing you should check is the ports on your MacBook. The type and number of ports may vary according to your MacBook. Older MacBook Pros, for example, only come with a Thunderbolt 3 port, while the latest Apple M2 MacBook Pros have USB-C (Thunderbolt 4) ports. In the past, a Mini DisplayPort (mDP or MiniDP) was included to connect an additional monitor seamlessly. However, this has been replaced by the Thunderbolt 4, which supports a single external display.
The problem with connecting an external monitor is its compatibility with the ports. When this happens, you could use a Universal Dock that converts Thunderbolt 3 to Thunderbolt 2, for example. The M1-powered MacBook Pro can have two external monitors with a 6k resolution at 60 Hz.
Today’s latest MacBook Pros are equipped with the Thunderbolt 4 port, that provides faster data transfers of up to 4GB/s. The standard USB-C port is only half as quick as the Thunderbolt 4. But even so, you would have no problems connecting standard USB-C on your MacBook Pro’s Thunderbolt 4 port.
Check your Monitor
Connecting dual monitors to a PC in the past was never a problem since these used standard ports across all devices. But with Apple moving to its Thunderbolt ports, it has become more difficult for Mac users to use non-Apple monitors for their dual monitor setup.
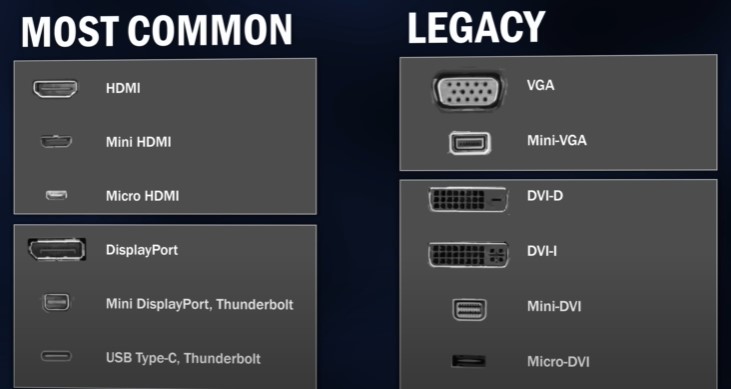
The most common way to connect your unsupported monitor is to use an HDMI cable since most monitors today are equipped with an HDMI port. However, the latest MacBook Pros have ditched the HDMI for Thunderbolt ports. In the case that your MacBook Pro does not come with an HDMI, a variety of adaptors in the market make it possible for your HDMI monitor to connect to a Thunderbolt port.
You could still connect monitors that only come with VGA or DVI ports using a Mini DisplayPort. It converts the signals from your MacBook Pro, allowing you to use your old monitor.
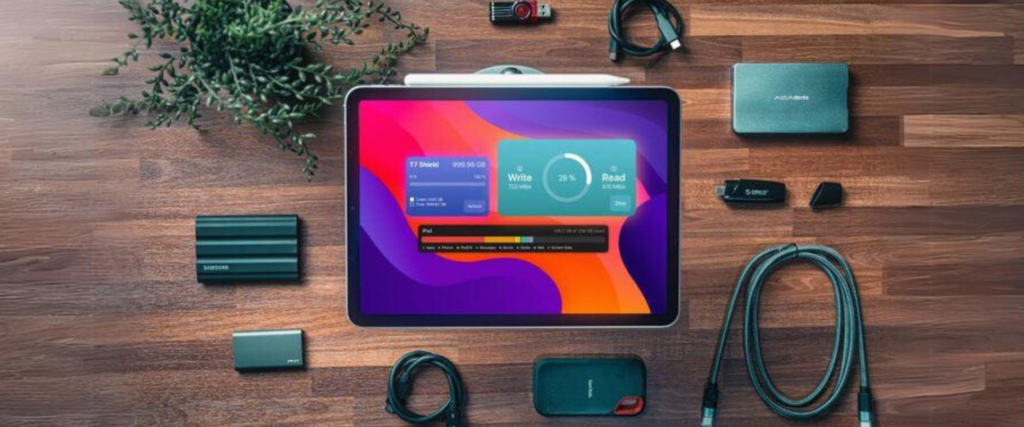
Check your Docking Station, Dongle, and Cable
The availability and type of ports depend on the age of your MacBook Pro. For those with older MacBook Pros (two or three generations and even earlier), you might have a mix of older Thunderbolt 2 and 3 ports or an HDMI port. But the Thunderbolt 3 is no pushover. It can be highly flexible for various purposes, including data transfer, video transfer, charging, connecting external devices, and more.
Most monitors these days still support the HDMI and USB 3.0 formats to connect to a computer. And if you have the latest refurbished MacBook Pro 2023 or any refurbished MacBook Pro that does not support this, it can be a problem. One way to accomplish this is by using a dongle or an adapter cable. However, both options require using more than one Thunderbolt 3 port on your Mac. Since only a few of these ports are available, connecting all peripherals to your Mac is preferable to using a single Thunderbolt 3 port.
With the help of a docking station, you can convert a single Thunderbolt 3 port on your Mac into several USB-C, USB 3.0, HDMI, Ethernet, and Display interfaces.
Check how many Monitors your MacBook Pro Support
It’s crucial for MacBook owners to understand that the M1 and M2 models only allow one external monitor. Dual monitor capability is available for those with MacBook Pro M1 Pro or M1 Max (and the eventual M2 upgrades), although both M1 and M2 CPUs can handle two monitors when using display adapters. If you are not sure what exact model, you could quickly check your MacBook Pro through our Apple serial number lookup.
Owners of the M1 and M2 powered MacBooks are capable of running dual monitor setups. But connecting another monitor is not a plug-and-play affair since this requires installing a DisplayLink software driver and using a dock to connect an external monitor. This is a bit of a letdown since the previous-generation MacBook Pro Intel came with external display connectivity right out of the box.
M2 Pro and M2 Max can take a breather since they have native support for more than one monitor. Below is a list of MacBooks and their maximum display:
- M1 MacBook Air: one external monitor
- M2 MacBook Air: one external monitor
- M1 MacBook Pro: one external monitor
- M2 MacBook Pro: one external monitor
- M1 Pro MacBook Pro: two external monitors
- M1 Max MacBook Pro: three external monitors
How to Connect an External Monitor to your MacBook Pro
After ensuring that everything is aligned perfectly – your second monitor, ports, and MacBook Pro- it is time to set up dual monitors on your laptop. The latest MacBook Pros provide support for a dual monitor setup or are at least compatible with a dock or adapter to make this possible. The 14-inch model and 16-inch model MacBook Pro are equipped with HDM and Thunderbolt ports, making it easy to connect a second monitor.
Connecting a second monitor is easy. You only have to follow these simple steps and enjoy the benefits of using a dual monitor setup in no time.
Step 1. Check how many monitors your MacBook Pro can connect to and the type of ports it supports (HDMI, Thunderbolt 3, Thunderbolt 4, etc.)
Step 2. Connect your monitor to your MacBook Pro. You are good to go if you’ve got the right cable, dock, or adapter.
Step 3. Once the monitor is properly connected to your MacBook Pro, locate the grey icon with gears in the top left area of your screen and go to ‘System Preferences.’
Step 4. Locate the monitor icon labeled ‘Displays’ and click it.
Step 5. After clicking on ‘Displays,’ click ‘Gather Windows.’ This will show you the monitors, including the external monitor connected to your MacBook Pro.
Step 6. Locate ‘Display Preferences’ and select ‘Arrangement.’ Doing this allows you to select the configuration on your monitors.
Troubleshooting Tips – Dual Monitor Setup for MacBook Pro
Tip 1. Verify that your display is compatible. If not, use a cable or docking station to connect your monitor to your MacBook Pro. However, this go-around might only work for moderately old monitors if your MacBook Pro runs the latest macOS version.
Tip 2. If you are using an old monitor, verify that it is working by connecting it to another computer.
Tip 3. Check your connections. It is advised that you make connections as simple as possible (e.g. don’t connect an adapter cable to a docking port when connecting your monitor). This can cause problems and result in your MacBook Pro not recognizing your monitor.
Tip 4. Check the health of your cables. Another possible explanation for your Mac not recognizing your external display is outdated, damaged, or simply not functioning cables.
Dual Monitor Setup for MacBook Pro – Why it is a Good Idea
MacBook Pros are designed for productivity, and adding a second monitor can improve your experience. More is better; in this case, having more screen space can help you organize your work better. It is also a cost-saver compared to buying another laptop or desktop.
Having a dual monitor setup is like having two MacBook Pros. It allows you to switch from one application to another without closing or minimizing the window. Dual monitors also let you answer a video call on one screen while pulling up your worksheets on another. Whatever the reason, the benefit of having a second screen is something you should consider.
 Adrienne Blanier


 Adrienne Blanier


 Ronald Uy


 Leah H. Blanchard


0 Comments