Performing a reset on Mac to factory settings can take care of numerous mac OS issues. It is very important in case you’re selling or giving away your current MacBook. If you’re giving an old Mac to anyone or selling your machine, or basically hoping to fix any issue in the machine, resetting it to factory settings and cleaning it will permit you to set it up like a new mac.
This implies you can pass it on without stressing that somebody could get to your information, and restart your Mac as though it was fresh out of the box. Not only you have to remove your personal data but you also need to ensure that there’s a working version of macOS introduced thereafter. That is essential too.
Our guide to reset MacBook permits you to reset your machine to a flawless factory state as if it is brand new with a perfect and working installation of macOS. Without further ado, let’s know the steps.
How to Factory reset a MacBook Pro
STEP 1: Backup of your Mac
Before you factory reset MacBook Pro, make sure you’re connected with the internet to download the most recent copy of the Mac operating system that will run on your machine. Resetting a Mac to factory settings removes all the information that is stored in that machine, so you might first need to make a backup of the data.
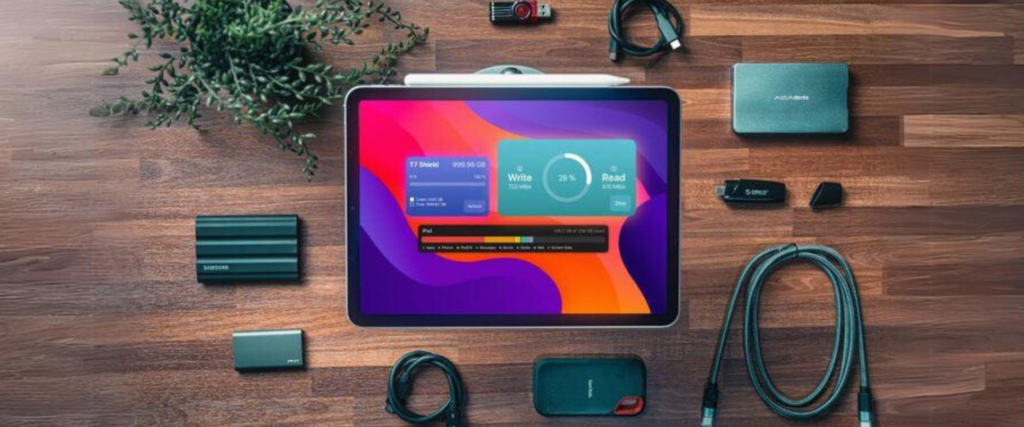
Backup can be done using the Time Machine software Apple gives or cloning your internal hard drive to an external drive. This empowers you to access all your old files, and the drive can be re-cloned if you need to restore your Mac. However, this won’t be fundamental if you are utilizing iCloud Drive to sync up all your data including documents and desktop and any other information on your Mac with all your Apple devices.
Since macOS Sierra showed up in 2016 it’s been conceivable to store everything on your Desktop by means of iCloud Drive. You’ll need to wait as it will take some time for everything to re-sync when you switch to another Mac.
If you prefer not to pay for iCloud storage and not to utilize Time Machine then you could make a clone of the entire hard drive utilizing a program like Carbon Copy Cloner or SuperDuper. You just need to choose your main hard drive in the source section and external hard drive in the destination then click on the clone icon.
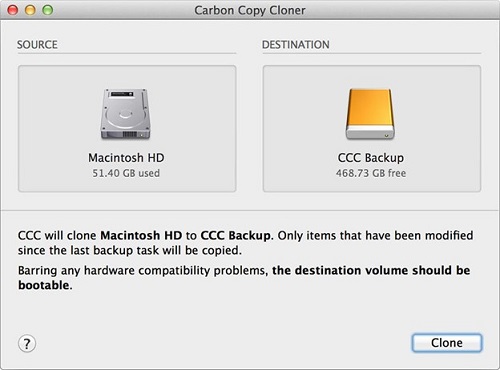
You will have the option to boot from the cloned external hard drive. You can also test this by resetting your Mac and hold down the Option/ Alt key when you boot up your Mac. Utilize the arrow keys on your Mac to choose the external drive and tap Enter. This will be re-cloned back to the main drive if you decide to restore your Mac, or it can be utilized to get to all the original documents from your laptop after you have cleaned the internal drive.
STEP 2: Sign Out of iTunes
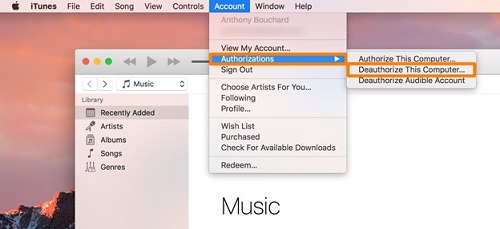
The next step is to deauthorize your iTunes store account through the Music application in macOS Catalina or iTunes. You have to go to the menu bar, then click on Account where you will find Authorizations. Click that and then click on deauthorize this computer. You will also have to deauthorize any third-party apps like Photoshop that are locked to your Mac.
If you are running macOS Catalina, iTunes no longer exists as an independent application, so you will rather get to the iTunes Store via the new Music application. Open the Music application to select Music and then click on Preferences from the menu bar.
Next is go to the General tab and select iTunes Store, from here you can get to your account and choose to deauthorize this PC. If you’re running a Mac that has iTunes 12, you’ll have to open iTunes and snap Account. Then click on Authorizations to deauthorize the MacBook. You have to enter your Apple ID and password for deauthorizing it.
STEP 3: Turn off Filevault
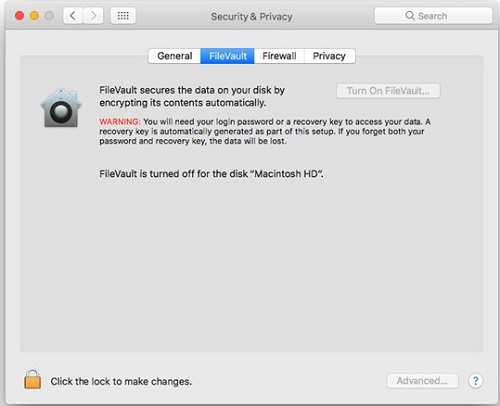
Filevault encrypts the documents on your hard drive. It is advisable to turn it off prior to going any further as it is not on by default. You’ll be removing the records afterward, so security shouldn’t be important.
To kill Filevault, start by opening System Preferences. Click on Security and Privacy to select the File Vault tab. Then check the box that says ‘Filevault is killed for the circle‘. If it’s already off then you don’t have to do anything. Click on the padlock icon in the bottom left to enter your username and password that will unlock the Turning off FileVault. Click on it in the end. It will take some time for decryption to take place.
STEP 4: Sign Out of iCloud
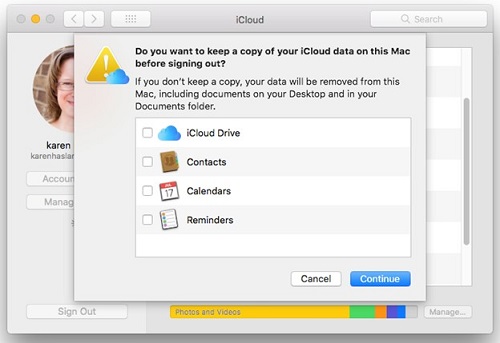
Furthermore, you’ll need to sign out of iCloud, iMessage, and FaceTime. Simply open System Preferences and snap-on iCloud. Then tap on Sign Out. To eliminate all your personal information, untick the boxes next to iCloud Drive, Contacts, Calendars, and Reminders. At that point, click Continue.
You might see a warning that iCloud Drive needs to complete the process of updating prior to proceeding with a sign-out. For MacBook Pro or MacBook Air with Touch ID, you should affirm that your payment details ought to be removed from the Mac. This will then eliminate any Apple Pay data. Next, you will be needed to enter your Apple ID password. Now you simply need to wait while iCloud does its stuff.
In case you’re utilizing OS X Mountain Lion or later, open the Messages application, at that point pick Messages, then click Preferences from the menu bar. Snap iMessage to click on Sign Out.
STEP 5: Unpair Bluetooth devices that you’re keeping
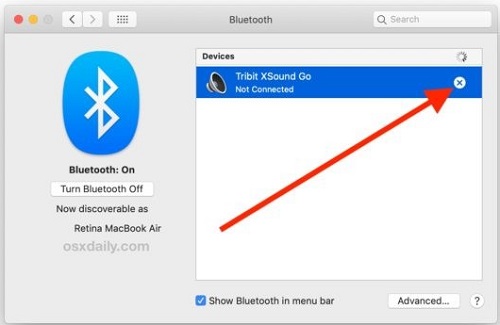
If your Mac is paired with a Bluetooth console, mouse, trackpad, or another Bluetooth gadget that you intend to keep, you can unpair it. This optional step halts accidental info when the Mac and gadget have separate owners yet remain in the Bluetooth range of one another.
If you’re unpairing Bluetooth input gadgets from other gadgets like an iMac, Mac mini, or Mac Pro, you should connect a USB console and mouse to finish the remaining steps in this article. To unpair, a Bluetooth gadget, click on the Apple menu, and then System Preferences to click Bluetooth. Move your pointer over the gadget that you need to unpair, and then click the eliminate button close to the gadget name.
STEP 6: Boot into macOS Recovery
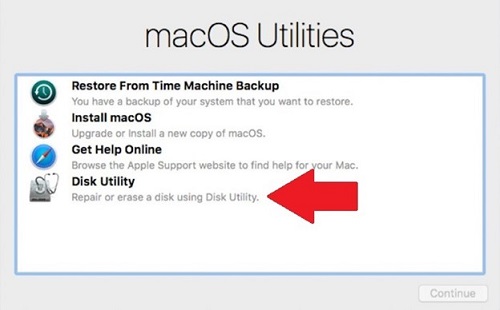
After backing up everything and shutting off all your iCloud association, the next main step is to factory reset MacBook Pro. The easiest way is to hold down the power button until a dialog box shows up, at that point choose the Restart option.
Another alternative is you can choose the Apple symbol in the upper left corner of the screen and select Restart. You can likewise utilize the console shortcut which includes a combination of control, Command, and Eject (or force button) if your computer freezes. It will take a while for the MacBook to start up in this mode.
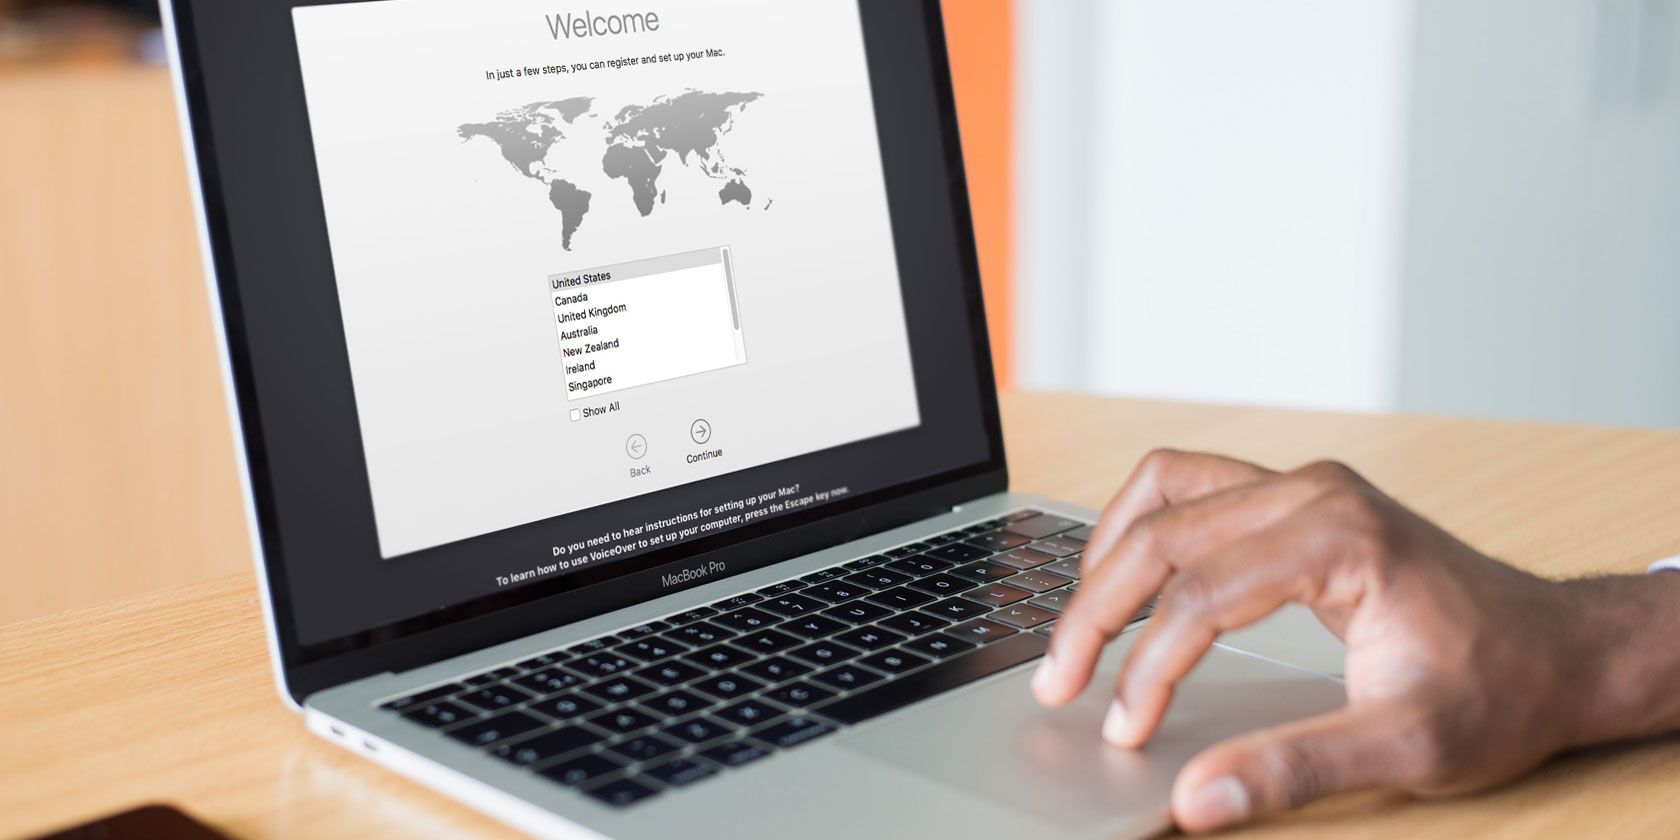
Afterward, you will see a screen asking you to pick a language. Anticipate that it should take some time for the Mac to start up in this mode. You may see a screen requesting that you pick a language. Next, you will see the Recovery Mode utility window.
STEP 7: Erase your Mac’s drive and reformat your Mac
Now you’re ready to delete your drive. This is the place where things will look somewhat changed if you are utilizing macOS Catalina in contrast to what it looked like previously.
When Apple presented macOS Catalina in 2019, it added another read-only volume known as Macintosh HD where the operating system lives. Close by it you will likewise have a Macintosh HD Data volume. This is the place where your information dwells.
Apple isolated the two volumes in Catalina so as to guarantee that basic operating system data can’t be overwritten. Yet it implies that you need to ensure all of your information is removed from your Mac prior to selling it on, or if you need to do a clean install, you should wipe these both volumes.
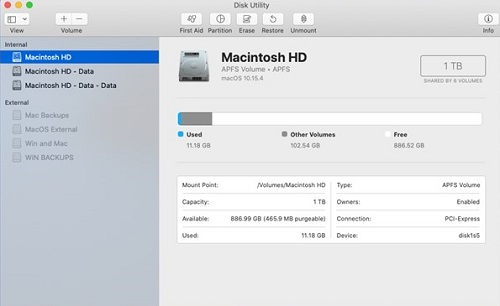
When you reset the MacBook pro in Catalina, you first need to delete the Macintosh HD Data volume before eradicating Macintosh HD. It’s essential to delete both. Click on this Macintosh HD Data drive to pick it. You can either click on the fasten or go to the menu and select Edit, then click on Delete APFS volume.
You will see a message advising that this will permanently remove your data. Click on Delete and wait till the process is completed. The next step is to go back again in Disk Utility to delete the Macintosh HD. You have to do these two phases as you won’t have the alternative to reinstall macOS over the most noteworthy point of macOS.
Moreover, you ought to reinstall the macOS to replicate the Macintosh HD-Data volume. Select on Macintosh HD to pick it and click on Erase. Enter a name you have to give the drive once you have reformatted it, for instance, Macintosh HD.
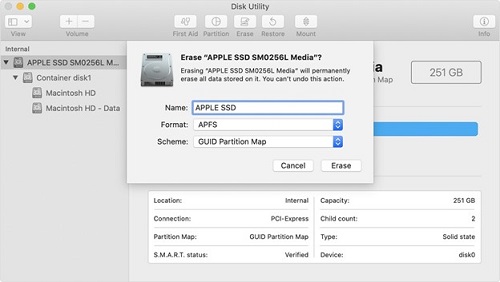
Now pick the setup. This will be APFS if you are using Catalina. Snap-on Erase and enter your Apple ID whenever it is required. For reinstalling the macOS, quit Disk Utility to revisit the MacOS utility screen. The accompanying stage incorporates reinstalling macOS.
Step 8: Reinstall macOS
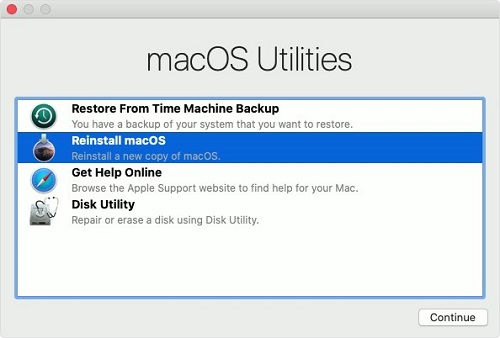
The final step is to reinstall macOS onto the MacBook. When you go back to the macOS utility screen, you will see Reinstall macOS. Click on it and follow the guidelines to reinstall a new and clean version of the operating system. If you intend to sell your Mac, then you can skip this step and let the new owner install it by themselves.
Those files that you saved through a Time Machine backup, you can now restore back via the macOS utility screen. All you have to do is to click restore from Time Machine Backup, and then select the backup from the list to reinstall your saved data.
Conclusion
In conclusion, this guide tells you precisely how to factory reset mac. Just be sure you have a backup of all your personal files, documents, or any other information that you care about prior to beginning this reset process. If you don’t back up your own information and records, they will be permanently lost as this cycle eradicates Mac’s memory and resets it to factory default settings. This is not a reversible process, which is why it is essential that you backup your data first.










0 Comments