The MacBook Air, since its inception, has been a beacon of design and functionality in the realm of ultraportable laptops. Revered for its sleek design, impressive battery life, and top-notch performance, it has garnered a significant user base and has become a staple for professionals, students, and everyday users alike. However, as with any piece of technology, it’s not immune to occasional hiccups.
Even the most reliable gadgets can sometimes present challenges, and a used MacBook Air is no exception. In the journey of using this iconic device, users might come across certain issues that require attention and resolution.
Table of Contents
- MacBook Air Won’t Turn On
- Battery Drains Quickly
- Wi-Fi Connectivity Issues
- Trackpad Not Responding
- MacBook Air Overheating
- Slow Performance
- Sound Issues
- Bluetooth Not Working
- Keyboard Malfunctions
- Display Issues
- External Devices Not Recognized
- Startup Disk Full Warning
- Camera Not Working
- External Display Not Working
- Charging Issues
My MacBook Air Won’t Turn On
The MacBook Air, a paragon of sleek design and efficient performance, occasionally faces the daunting issue of not powering on. This can be particularly distressing, especially when you’re gearing up for an important task or presentation.
Symptoms: Imagine you’re in a cafe, prepping for a crucial presentation. You open your MacBook Air, press the power button, and… nothing. The screen remains pitch black, devoid of the familiar Apple logo or any sign of activity. This scenario, where there’s no response when the power button is pressed, is a clear indication of the MacBook Air failing to turn on.
Simple Fix: Before diving into worst-case scenarios or fearing extensive repairs, there’s a primary troubleshooting step that has proven effective for many: Resetting the System Management Controller (SMC). The SMC is a subsystem in Intel-based Mac computers, governing a variety of low-level functions, including power management and hardware integration.
How to Reset the SMC on a MacBook Air:
- Ensure your MacBook Air is completely shut down.
- If you have a MagSafe adapter, connect it to a power source and then to your Mac.
- On the built-in keyboard, simultaneously press and hold the Shift, Control, Option, and power keys.
- After holding for a few seconds, release all the keys and the power button at once.
- Finally, press the power button again to turn on your MacBook Air.
A MacBook Air reset often resolves the issue, bringing your MacBook Air back to its responsive state. However, if the problem persists, it’s advisable to seek professional assistance, either through Apple support or by visiting an Apple Store.
Battery Drains Quickly
The MacBook Air, renowned for its impressive battery life, sometimes faces the unexpected challenge of rapid battery depletion. This can be particularly frustrating, especially if you’re away from a power source or in the middle of important work.
Symptoms: Picture this: You’ve fully charged your MacBook Air in the morning, expecting it to last the entire day based on your usual usage. However, by midday, you’re startled to see the battery indicator plummeting to 20%. Such a drastic and unusual reduction in battery life over a short period is a clear sign that the MacBook Air’s battery is draining faster than it should.
Simple Fix: Before jumping to conclusions about battery health or considering a replacement, there are several troubleshooting steps that can potentially rectify the rapid battery drain. One of the primary solutions is to check for energy-consuming apps and adjust certain settings.
Steps to Address Rapid Battery Drain:
- Activity Monitor Check: Open the Activity Monitor and click on the “Energy” tab. This will display apps and processes that are consuming significant battery power. If an app is using more energy than expected, consider closing it or checking if there’s an update available that might resolve the issue.
- Screen Brightness: One of the most significant contributors to battery drain is screen brightness. Lowering the screen brightness to a comfortable level can substantially extend battery life.
- Turn Off Unnecessary Features: Features like keyboard backlighting, Bluetooth (if not in use), and dynamic wallpapers can consume extra power. Consider turning them off when trying to conserve battery.
- Update macOS: Sometimes, the issue can be software-related. Ensure your macOS is up-to-date, as Apple often releases updates that optimize battery performance.
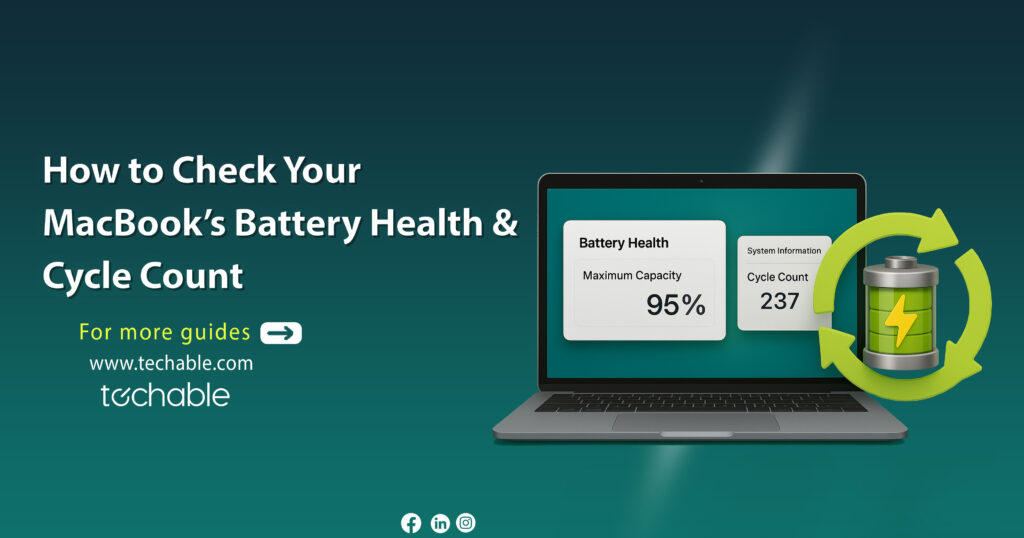
By following these steps, you can potentially address and rectify the rapid battery drain issue. You could also folIow these tips on improving your MacBook battery life. But if the problem continues, it might be worth checking the battery’s health in the “System Information” section or consulting with Apple support for further diagnostics.
Wi-Fi Connectivity Issues
The MacBook Air, with its seamless internet browsing experience, can sometimes be plagued by unpredictable Wi-Fi connectivity issues. Such interruptions can be a major hindrance, especially in today’s digital age where consistent internet access is paramount.
Symptoms: Imagine you’re in the middle of an online meeting or streaming your favorite show, and suddenly, the buffer icon starts spinning, or the connection drops entirely. Or perhaps you notice that your MacBook Air frequently disconnects from the Wi-Fi or struggles to find networks it previously connected to with ease. These scenarios, characterized by intermittent or no connection to Wi-Fi networks, signify potential Wi-Fi connectivity issues with the MacBook Air.
Simple Fix: Before considering hardware faults or contacting your internet service provider, there are several primary troubleshooting steps that can help restore a stable Wi-Fi connection. One of the most effective solutions is to toggle Wi-Fi settings and, if necessary, reset specific system settings.
Steps to Fix Wi-Fi Connectivity Issues
- Toggle Wi-Fi: The first and simplest step is to turn off the Wi-Fi on your MacBook Air and then turn it back on. This can often re-establish a lost connection.
- Forget Network and Reconnect: Go to System Preferences > Network > Wi-Fi, select your network, and click the minus (-) button to remove it. Then, reconnect by selecting the network and entering the password.
- Reset NVRAM/PRAM: The NVRAM (non-volatile random-access memory) and PRAM (parameter random-access memory) store certain settings, including Wi-Fi network configurations. Resetting the NVRAM/PRAM can help resolve connectivity issues. To do this, shut down your MacBook Air, then turn it on and immediately press and hold the Option, Command, P, and R keys for about 20 seconds.
- Check for macOS Updates: Apple frequently releases software updates that address connectivity issues. Ensure your macOS is up-to-date.
- Restart Your Router: Sometimes, the issue might not be with the MacBook Air but with the router. Restarting the router can help establish a more stable connection.
If, after trying these solutions, the Wi-Fi connectivity issues persist, it might be beneficial to consult with Apple support or explore potential issues with your internet service provider.
Trackpad Not Responding
The MacBook Air’s trackpad, celebrated for its precision and multi-touch gestures, can sometimes become unresponsive or erratic. Such behavior can disrupt tasks, from simple browsing to more intricate design work, making it essential to address promptly.
Symptoms: Imagine you’re scrolling through a lengthy document or trying to drag and drop files, and suddenly the cursor freezes. Or perhaps you notice that the cursor jumps around the screen erratically, even when you’re not touching the trackpad. These instances, where the trackpad either doesn’t respond or behaves unpredictably, are clear indicators of trackpad-related issues.
Simple Fix: Before assuming a hardware malfunction or thinking about a replacement, there are several basic troubleshooting steps that can often rectify trackpad issues. One of the primary solutions is to check for external interferences and, if necessary, reset specific system settings.
Steps to Address Trackpad Issues:
- External Factors: Ensure there’s nothing physically obstructing the trackpad. For instance, a stray piece of debris or even moisture can affect its responsiveness. Clean the trackpad gently with a soft, lint-free cloth.
- Check for Software Updates: Sometimes, the issue can be software-related. Apple often releases updates that address hardware compatibility and performance. Ensure your macOS is up-to-date.
- Reset the SMC (System Management Controller): The SMC manages various low-level functions, including trackpad responsiveness. Resetting the SMC can help resolve trackpad issues. To do this on a MacBook Air:
- Shut down the MacBook Air.
- Plug in the MagSafe adapter to a power source and connect it to your Mac.
- Press and hold the Shift, Control, Option, and power keys simultaneously for a few seconds.
- Release all keys and the power button.
- Turn on the MacBook Air by pressing the power button.
- Adjust Trackpad Settings: Go to System Preferences > Trackpad and ensure that the settings are configured correctly. For instance, if “Tap to click” is off, you might think the trackpad isn’t responding when you tap it.
- External Devices: If you have an external mouse or peripheral connected, disconnect it to see if it’s causing interference with the trackpad.
If the trackpad continues to be unresponsive or erratic after trying these solutions, it might be time to consult with Apple support or visit an Apple Store for a more in-depth diagnosis.
MacBook Air Overheating
The MacBook Air, known for its slim design and efficient performance, can sometimes experience overheating issues. An example is that there has been some reports of unusual heat from MacBook Air 2020 models. Overheating not only affects the device’s performance but can also reduce its lifespan, making it crucial to address.
Symptoms: Imagine you’re working on a project, and you start to feel the base of your MacBook Air becoming unusually hot. The fans might kick into high gear, producing a noticeable noise, even when you’re running lightweight applications. Or perhaps the system starts to lag, apps become unresponsive, and in extreme cases, the MacBook Air might shut down to protect its internal components. These are clear signs that your MacBook Air is overheating.
Simple Fix: Before jumping to conclusions about hardware malfunctions, there are several primary steps that can help manage and reduce overheating. One of the key solutions is to ensure proper ventilation and monitor CPU-intensive applications.
Steps to Address Overheating:
- Proper Ventilation: Ensure that the MacBook Air’s vents aren’t obstructed. Using the MacBook Air on soft surfaces like beds or couches can block the vents. Always use it on a hard, flat surface, and consider investing in a laptop cooling pad or stand to improve airflow.
- Monitor CPU Usage: Open the Activity Monitor and check the “CPU” tab to identify apps or processes consuming excessive CPU resources. Some applications, especially video editing software or games, can cause the CPU to work harder, leading to overheating. Consider closing or updating apps that use excessive CPU.
- Update macOS: Apple frequently releases software updates that can optimize system performance and reduce overheating issues. Ensure your macOS is up-to-date.
- Reset the SMC (System Management Controller): As mentioned earlier, the SMC manages various low-level functions, including thermal management. Resetting the SMC can help in regulating the MacBook Air’s temperature.
- Limit Multitasking: Running multiple applications or having numerous browser tabs open can strain the system. Close unnecessary apps and tabs to reduce the workload on your MacBook Air.
- External Factors: Keep the MacBook Air away from direct sunlight or hot environments. External heat sources can exacerbate the overheating issue.
If the MacBook Air continues to overheat you can also try these tips on how to prevent MacBook from overheating, it’s advisable to consult with Apple support or visit an Apple Store. Persistent overheating can indicate underlying hardware issues that might need professional attention.
Slow Performance
The MacBook Air, heralded for its swift operations and smooth multitasking capabilities, can sometimes exhibit a decline in performance speed. A lagging system can hinder productivity and become a source of frustration for users.
Symptoms: Imagine you’re launching an application that usually opens instantaneously, but now it takes several seconds or even minutes. Or perhaps you’re switching between apps, and there’s a noticeable delay, or animations become choppy. Web pages might take longer to load, files take more time to open, and even simple tasks feel sluggish. These scenarios indicate that your MacBook Air is experiencing slow performance.
Simple Fix: Before considering hardware upgrades or thinking about a replacement, there are several primary steps that can rejuvenate your MacBook Air’s performance. Key solutions include clearing cache, monitoring resource-intensive applications, and ensuring ample storage space.
Steps to Address Slow Performance:
- Check Activity Monitor: Open the Activity Monitor to see which apps or processes are consuming significant RAM or CPU resources. Applications that are unresponsive or using an excessive amount of resources can be closed or restarted to improve performance.
- Clear Cache and Temporary Files: Over time, cache and temporary files accumulate and can slow down your system. Consider using utilities or manual methods to clear out cache and temporary files. This not only frees up storage space but can also boost performance.
- Update macOS and Apps: Outdated software can lead to compatibility issues and performance lags. Ensure your MacBook Air is updated with the latest macOS and all apps are up-to-date. Apple’s updates often include performance enhancements and bug fixes.
- Limit Startup Items: Some applications are set to launch automatically upon startup, which can slow down the boot time. Go to System Preferences > Users & Groups > Login Items to see which apps start up with your system. Consider removing unnecessary items from this list.
- Ensure Adequate Storage: If your MacBook Air’s storage is nearly full, it can impact performance. Ensure you have at least 10-15% of your total storage free. Move large files to external drives, use cloud storage, or delete unnecessary files.
- Reset NVRAM/PRAM: The NVRAM and PRAM store certain settings related to display, battery, and system performance. Resetting the NVRAM/PRAM can sometimes resolve performance issues.
If, after implementing these solutions, the MacBook Air’s performance doesn’t improve, it might be worth considering hardware upgrades, such as increasing RAM or switching to a faster SSD, or consulting with Apple support for further diagnostics. Remember, regular maintenance and monitoring can go a long way in ensuring optimal performance for your MacBook Air.
Sound Issues
The MacBook Air, with its crisp audio output, can sometimes encounter unexpected sound anomalies. Whether it’s a complete lack of audio or inconsistent sound levels, such issues can impact the overall user experience, especially during media consumption or virtual meetings.
Symptoms: Imagine you’re about to watch a much-anticipated webinar, but when you hit play, there’s complete silence. Alternatively, you might be listening to music and suddenly notice that the sound fluctuates or becomes distorted. Or perhaps system alerts and notification sounds are louder or softer than usual. These are clear indicators of sound-related issues on your MacBook Air.
Simple Fix: Before considering external hardware faults or thinking about speaker replacements, there are several primary troubleshooting steps that can often rectify sound issues. Key solutions include checking sound settings, ensuring correct output selection, and resetting certain system settings.
Steps to Address Sound Issues:
- Check Sound Settings: Navigate to System Preferences > Sound. Ensure the volume slider is not set to the lowest and that the “Mute” checkbox is unchecked. Sometimes, accidental changes in these settings can lead to sound issues.
- Ensure Correct Output Selection: Still in the Sound preferences, click on the “Output” tab. Ensure the correct output device (usually “Internal Speakers” for MacBook Air) is selected. If you have external speakers or headphones connected, they might override the default setting.
- Check Individual App Settings: Some applications, like video conferencing tools or media players, have their own volume controls. Ensure that the volume within these apps is set appropriately. For instance, if you’re on a Zoom call and can’t hear the other participants, the volume slider within Zoom might be set to low.
- Reset NVRAM/PRAM: As mentioned in previous sections, the NVRAM and PRAM store specific settings, including sound preferences. Resetting the NVRAM/PRAM can help resolve sound anomalies.
- External Devices: If you’re using external speakers or headphones, ensure they’re properly connected. Sometimes, the issue might be with the external device rather than the MacBook Air itself.
- Software Updates: Ensure your macOS is up-to-date. Apple often releases updates that can fix known sound issues or improve audio performance.
If, after trying these solutions, the sound issues persist, it might be indicative of a hardware problem with the MacBook Air’s speakers. In such cases, it’s advisable to consult with Apple support or visit an Apple Store for a professional assessment. Remember, sound is a crucial aspect of the overall computing experience, and addressing issues promptly can ensure an uninterrupted and enjoyable user experience.
Bluetooth Not Working
The MacBook Air, equipped with Bluetooth capabilities, allows users to connect a myriad of devices wirelessly, from headphones to external keyboards. However, there are times when Bluetooth connections can become erratic or entirely non-functional, disrupting the seamless integration of peripherals.
Symptoms: Imagine you’re about to start a workout session, and you attempt to connect your Bluetooth headphones to your MacBook Air to play your favorite playlist. But, no matter how many times you try, the connection fails. Or perhaps you’ve been using an Apple airpod, Bluetooth mouse, and suddenly it becomes unresponsive or frequently disconnects. These scenarios, characterized by devices not connecting or frequently disconnecting, indicate potential Bluetooth connectivity issues with the MacBook Air.
Simple Fix: Before jumping to hardware conclusions or considering device replacements, there are several primary troubleshooting steps that can often restore Bluetooth functionality. Key solutions include toggling Bluetooth settings, removing and re-pairing devices, and resetting the Bluetooth module.
Steps to Address Bluetooth Connectivity Issues:
- Toggle Bluetooth: A simple yet effective first step is to turn off the Bluetooth on your MacBook Air and then turn it back on. This can often re-establish lost connections.
- Remove and Re-pair Devices: Navigate to System Preferences > Bluetooth. Find the device that’s causing issues, right-click on it, and select “Remove.” Then, set the device to pairing mode and reconnect it to your MacBook Air.
- Reset Bluetooth Module: Hold down the Shift + Option keys and click on the Bluetooth icon in the menu bar. This will reveal a hidden menu. From this menu, select “Reset the Bluetooth module.” After doing this, you’ll need to re-pair your Bluetooth devices.
- Check for Interferences: Other electronic devices or Wi-Fi networks can sometimes interfere with Bluetooth connections. Ensure that your MacBook Air is away from potential sources of interference, such as cordless phones, microwaves, or other Bluetooth devices.
- Update macOS: Apple frequently releases software updates that can address known Bluetooth issues or improve connectivity performance. Ensure your macOS is up-to-date.
- Check Device Compatibility: Ensure that the Bluetooth device you’re trying to connect is compatible with your MacBook Air and supports the same Bluetooth version.
If, after implementing these solutions, the Bluetooth connectivity issues persist, it might be worth consulting with Apple support or visiting an Apple Store for further diagnostics. Remember, Bluetooth is a vital feature for many users, and addressing issues promptly can ensure a smooth and integrated user experience.
Keyboard Malfunctions
The MacBook Air’s keyboard, known for its tactile feedback and comfortable typing experience, can sometimes exhibit unexpected malfunctions. Whether it’s unresponsive keys, repeated characters, or unusual noises, such issues can significantly hinder productivity and overall user experience.
Symptoms: Imagine you’re drafting an important email, and you realize that pressing the “E” key either produces no character or types “EE” instead of a single “E”. Or perhaps certain keys feel sticky or produce a louder click than others. These inconsistencies, characterized by keys not responding, producing repeated characters, or exhibiting unusual feedback, are clear indicators of keyboard malfunctions on the MacBook Air.
Simple Fix: Before considering a hardware repair or keyboard replacement, there are several primary troubleshooting steps that can often rectify keyboard issues. Key solutions include cleaning the keyboard, resetting keyboard settings, and checking for software conflicts.
Steps to Address Keyboard Malfunctions:
- Clean the Keyboard: Dust, debris, or even tiny crumbs can get lodged under the keys, affecting their responsiveness. Use a soft brush or compressed air to gently clean the keyboard. Ensure the MacBook Air is turned off and tilted at an angle to prevent debris from going deeper.
- Check Keyboard Settings: Navigate to System Preferences > Keyboard. Ensure that the “Key Repeat” and “Delay Until Repeat” settings are set to your preference. Sometimes, unintentional changes to these settings can cause keys to behave erratically.
- External Devices: If you have an external keyboard connected, disconnect it and check if the issue persists. Sometimes, external devices can conflict with the built-in keyboard.
- Update macOS: Apple often releases software updates that can address known keyboard issues or improve keyboard performance. Ensure your macOS is up-to-date.
- Safe Mode: Boot your MacBook Air in Safe Mode by holding down the Shift key during startup. This mode loads only essential software and can help identify if third-party software is causing the keyboard issues.
- Reset the SMC: As previously mentioned, the System Management Controller (SMC) manages various low-level functions, including keyboard responsiveness. Resetting the SMC can help resolve keyboard-related issues.
If, after trying these solutions, the keyboard malfunctions continue, it might indicate a more severe hardware issue. In such cases, it’s advisable to consult with Apple support or visit an Apple Store for a professional assessment and potential repair. Remember, the keyboard is a fundamental component of the MacBook Air, and addressing issues promptly ensures a seamless typing and computing experience.
Display Issues
The MacBook Air’s Retina display, celebrated for its vibrant colors and sharp resolution, can sometimes face unexpected visual anomalies. From flickering screens to unusual color tints or even dead pixels, such issues can detract from the visual experience the device is known for.
Symptoms: Imagine you’re engrossed in a design project, and suddenly you notice a persistent line running across the screen. Or perhaps while watching a movie, the screen starts to flicker intermittently. In another scenario, you might boot up your MacBook Air to find that the display has an unusual blue or yellow tint. These visual disruptions, characterized by flickering, color inconsistencies, or unresponsive pixels, indicate potential display issues with the MacBook Air.
Simple Fix: Before jumping to conclusions about hardware replacements or screen repairs, there are several primary troubleshooting steps that can often address display issues. Key solutions include adjusting display settings, checking for external interferences, and resetting specific system settings.
Steps to Address Display Issues:
- Adjust Display Settings: Navigate to System Preferences > Displays. Ensure the resolution is set correctly and try adjusting the brightness. Sometimes, minor tweaks can rectify visual anomalies.
- External Interferences: Electronic devices or even magnets placed close to the MacBook Air can interfere with its display. Ensure there are no such items near the device that might be causing the display issues.
- Update macOS: Apple frequently releases software updates that can address known display issues or improve visual performance. Ensure your macOS is up-to-date.
- Safe Mode: Booting your MacBook Air in Safe Mode, as mentioned earlier, can help identify if third-party software or drivers are causing the display issues. If the display works fine in Safe Mode, the problem might be software-related.
- Reset NVRAM/PRAM: The NVRAM and PRAM, which store specific settings related to display preferences, can sometimes get corrupted. Resetting the NVRAM/PRAM can help resolve display anomalies.
- Check for Physical Damage: Inspect the MacBook Air for any signs of physical damage, especially around the screen area. Drops or hard impacts can affect the display’s functionality.
If, after implementing these solutions, the display issues persist, it might indicate a more severe hardware problem with the screen or graphics card. In such cases, it’s advisable to consult with Apple support or visit an Apple Store for a professional assessment and potential repair. Remember, the display is a critical component of the MacBook Air, and ensuring its optimal performance is key to a fulfilling user experience.
External Devices Not Recognized
The MacBook Air, with its versatile ports and compatibility, is designed to seamlessly connect with a range of Apple accessories, from USB drives to external monitors. However, there can be instances when these devices aren’t recognized or fail to function as expected, leading to disruptions in workflows and tasks.
Symptoms: Imagine you’re about to give a presentation, and you plug in your external monitor, but the MacBook Air doesn’t detect it. Or perhaps you insert a USB drive containing crucial files, but it doesn’t appear on your desktop or in Finder. These scenarios, characterized by external devices not being detected or malfunctioning, indicate potential connectivity or compatibility issues with the MacBook Air.
Simple Fix: Before considering port repairs or deeming external devices faulty, there are several primary troubleshooting steps that can often rectify these connectivity issues. Key solutions include checking cables and connections, ensuring device compatibility, and updating drivers or software.
Steps to Address External Device Issues:
- Check Cables and Connections: Ensure that all cables are securely connected. Sometimes, a loose connection or a faulty cable can be the culprit. If possible, try using a different cable or connect the device to another port.
- Ensure Device Compatibility: Not all devices may be compatible with your MacBook Air or the version of macOS you’re running. Check the device’s specifications or manufacturer’s website to ensure it’s compatible with your MacBook model and software version.
- Update Drivers or Software: Some external devices require specific drivers or software to function correctly with macOS. Visit the manufacturer’s website and ensure you have the latest drivers or software installed.
- Restart the MacBook Air: A simple system restart can often resolve connectivity issues. Ensure you save any ongoing work and then restart your MacBook Air.
- Reset the SMC: As previously discussed, the System Management Controller (SMC) manages various low-level functions, including recognizing connected devices. Resetting the SMC can help in detecting external devices.
- Check for macOS Updates: Apple frequently releases software updates that can improve compatibility with external devices. Ensure your macOS is up-to-date.
- Test on Another Computer: If possible, connect the external device to another computer. This can help determine if the issue lies with the MacBook Air or the external device itself.
If, after trying these solutions, the external device issues persist, it might indicate a more severe problem with the MacBook Air’s ports or hardware. In such cases, it’s advisable to consult with Apple support or visit an Apple Store for a professional assessment. Remember, seamless integration with external devices enhances the MacBook Air’s functionality, and addressing issues promptly ensures a smooth and efficient user experience.
Startup Disk Full Warning
One of the common issues MacBook Air users might encounter is the “Startup Disk Full” warning. This alert indicates that the primary storage drive of the MacBook Air is running out of space, which can hinder performance and prevent new files or applications from being saved or installed.
Symptoms: Imagine you’re trying to download a new application or save a large project, and you’re greeted with a warning message stating, “Your startup disk is almost full.” This can be accompanied by noticeable system lags, longer boot times, and applications becoming unresponsive.
Fix: Addressing this issue promptly is crucial to ensure the smooth operation of your MacBook Air and to prevent potential data loss.
- Clear Out Unnecessary Files: Over time, temporary files, cache, and old backups can accumulate, taking up significant storage space. Consider using built-in tools like “Disk Cleanup” or third-party applications to identify and remove these unnecessary files.
- Move Large Files to an External Drive: If you have large files, such as movies, high-resolution photos, or extensive databases, consider moving them to an external hard drive. This not only frees up space on your startup disk but also ensures that your important files are backed up.
- Uninstall Apps You No Longer Use: Applications can occupy a considerable amount of storage space, especially if they come with bundled libraries and resources. Navigate to the Applications folder and uninstall any apps that you no longer need or use. Remember to empty the Trash after uninstalling to free up the space.
- Check Downloads and Trash: Often, the Downloads folder can contain large files that were only needed temporarily. Regularly check and clear out unnecessary downloads. Additionally, ensure that the Trash is emptied regularly, as files in the Trash still occupy disk space.
By taking these steps, you can free up significant storage space on your MacBook Air, ensuring optimal performance and preventing the “Startup Disk Full” warning from reoccurring.
Camera Not Working
The MacBook Air’s built-in FaceTime HD camera is essential for video calls, virtual meetings, and other multimedia tasks. However, there can be instances when the camera fails to activate or deliver a video feed, leading to disruptions, especially in today’s remote-working environment.
Symptoms: Imagine you’re about to join a crucial video conference, and when you launch the video conferencing app, you’re greeted with a black screen or an error message indicating that the camera cannot be accessed. This can be frustrating, especially when communication is time-sensitive.
Fix: Addressing camera issues promptly is vital to ensure uninterrupted communication and multimedia tasks.
- Ensure No Other Apps Are Using the Camera: Only one application can access the MacBook Air’s camera at a time. If you have multiple video conferencing or camera apps open, ensure that only the one you’re currently using has access. Close any unnecessary apps that might be trying to use the camera.
- Restart the MacBook Air: A simple system restart can often resolve hardware and software glitches, including those related to the camera. Save any ongoing work and then restart your MacBook Air to see if the camera functionality is restored.
- Check for macOS Updates: Apple frequently releases software updates that can address known camera issues or improve camera performance. Navigate to System Preferences > Software Update and ensure your macOS is up-to-date.
By following these steps, you can often rectify camera-related issues on your MacBook Air, ensuring clear video feeds and uninterrupted virtual interactions. If the problem persists, it might be advisable to consult with Apple support for further diagnostics.
External Display Not Working
The MacBook Air, with its capability to connect to external displays, provides users with an extended workspace, ideal for multitasking, presentations, or media consumption. However, there might be times when the external display doesn’t mirror or extend the MacBook Air’s screen as expected.
Symptoms: Imagine you’re setting up for a presentation, and you connect your MacBook Air to a projector or monitor, but nothing appears on the screen. Or perhaps you’ve connected to an external monitor for a dual-screen setup, but the monitor remains blank or displays an “input not detected” message. These scenarios indicate potential external display connectivity issues with the MacBook Air.
Fix: Ensuring a seamless connection with external displays is crucial, especially in professional or academic settings.
- Check the Cable Connection: Ensure that the cable connecting the MacBook Air to the external display is securely plugged in at both ends. If possible, try using a different cable to rule out the possibility of a faulty cable.
- Ensure the Display is Powered On and Set to the Correct Input Source: Some monitors or projectors have multiple input sources (e.g., HDMI, VGA, DisplayPort). Ensure that the external display is powered on and set to the input source corresponding to the cable you’re using.
- System Preferences > Displays: Navigate to System Preferences > Displays on your MacBook Air. Click on the “Detect Displays” button. This prompts the MacBook Air to search for and recognize any connected external displays.
- Adjust Display Settings: Still within the Displays settings, ensure that the resolution and refresh rate are compatible with the external display. Some monitors or projectors may not support all resolutions or refresh rates.
By following these steps, you can often rectify issues related to external display connectivity, ensuring a smooth and extended visual experience with your MacBook Air. If the problem persists, consider consulting with Apple support or checking the external display’s manual for further troubleshooting steps.
Charging Issues
The MacBook Air, known for its impressive battery life, can sometimes face challenges related to charging. Whether it’s a battery that won’t charge, a charger that’s not recognized, or the charging process being unusually slow, such issues can be concerning for users who rely on their device for extended periods.
Symptoms: Imagine you’ve had a long day of work, and you plug in your MacBook Air to charge overnight. However, in the morning, you find that the battery percentage hasn’t increased. Or perhaps you notice that the charging indicator doesn’t light up when you connect the charger. These scenarios highlight potential charging issues with the MacBook Air.
Fix: Ensuring consistent and efficient charging is crucial to maximize the MacBook Air’s uptime and performance.
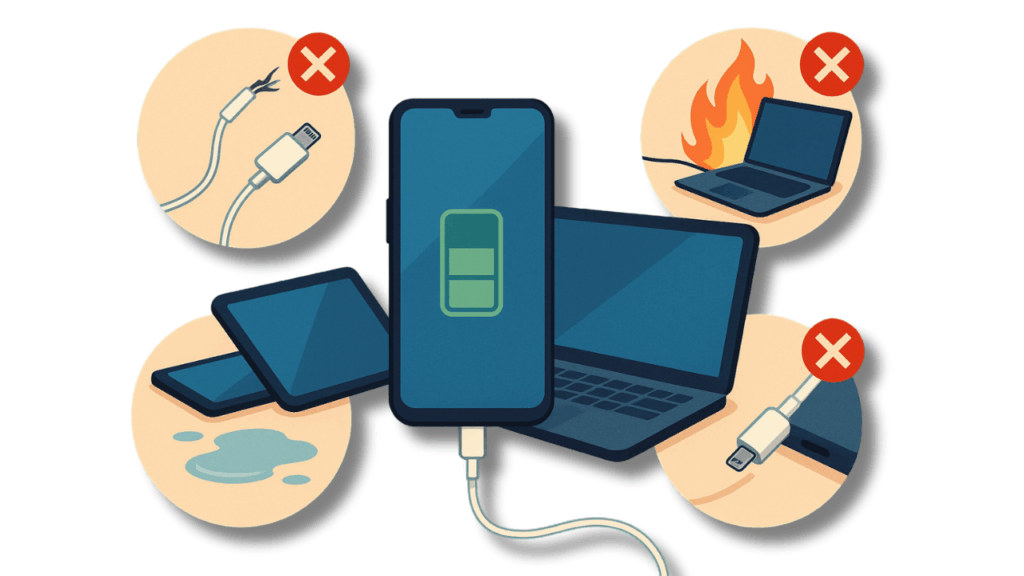
- Check the Charger and Cable for Damage: Inspect the charger and the charging cable for any visible signs of wear, tear, or damage. Frayed cables or damaged connectors can prevent efficient charging. If there’s noticeable damage, consider replacing the charger or cable.
- Try a Different Power Outlet: Sometimes, the issue might not be with the MacBook Air or its charger but with the power outlet itself. Plug the charger into a different outlet to see if it makes a difference.
- Reset the SMC: The System Management Controller (SMC) manages various power-related functions of the MacBook Air, including battery management and charging. If you’re facing charging issues, resetting the SMC might help. To do this:
- Shut down the MacBook Air.
- Plug in the MagSafe adapter to a power source and connect it to your Mac.
- Press and hold the Shift, Control, Option, and power keys simultaneously for a few seconds.
- Release all keys and the power button.
- Turn on the MacBook Air by pressing the power button.
By following these steps, you can often address and rectify charging-related issues, ensuring that your MacBook Air remains powered and ready for use. If the problem persists, it might be advisable to consult with Apple support or visit an Apple Store for further diagnostics and potential battery or charger replacements.
“At Techable.com, we pride ourselves on breathing new life into premium Apple products. Dive into our collection of expertly refurbished MacBook Airs, iMacs, MacBook Pros, MacBooks, iPhones, Mac Pros, and other select devices. Each product undergoes rigorous quality checks to ensure it meets our high standards, ensuring you receive the best of Apple without the premium price tag. And because we stand firmly behind the quality of our products, we offer an industry-leading warranty of up to 3 years on our devices. Still on the fence? Our 30-day return policy ensures peace of mind with every purchase. Choose Techable, where quality meets affordability.”











0 Comments