
Backing up your iPhone is the easiest way to protect your photos, messages, contacts, and apps from accidental loss. If you’re upgrading to a new iPhone, troubleshooting issues, or simply want a safe copy of your data, creating a local iPhone backup on your MacBook is one of the best options—especially if you don’t want to rely on iCloud.
In this SEO-focused guide, you’ll learn how to Back Up iPhone to a Mac using Finder (macOS Catalina and newer), plus how to encrypt your backup and confirm it worked.
Quick Answer: Can you back up an iPhone to a Mac Without Using iCloud?
Yes. You can back up your iPhone to your MacBook using Finder. This creates a local backup stored on your Mac (no cloud storage required).
Prefer to watch instead of read? > Check out our quick 1-minute video tutorial from Techable Labs to see exactly how it’s done before diving into the step-by-step guide below!
📺 Watch here:
Otherwise, keep reading for the full written instructions!
What You Need Before You Start
To back up your iPhone to a MacBook, you’ll need:
-
Your iPhone
-
A MacBook running macOS Catalina or later (Big Sur, Monterey, Ventura, Sequoia)
-
A compatible USB cable (Lightning to USB / Lightning to USB-C, depending on your Mac)
Tip: If your Mac only has USB-C ports, use a Lightning-to-USB-C cable or an adapter.
How to Back Up iPhone to MacBook Using Finder (macOS Catalina or Newer)
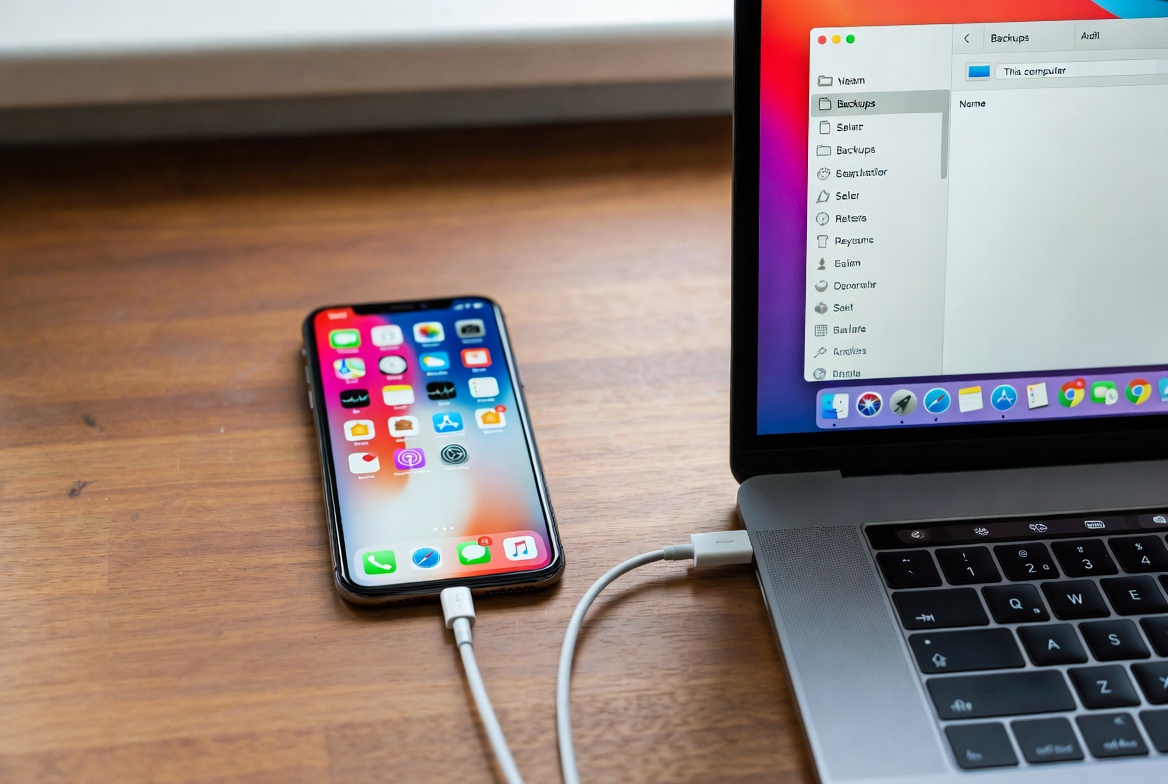
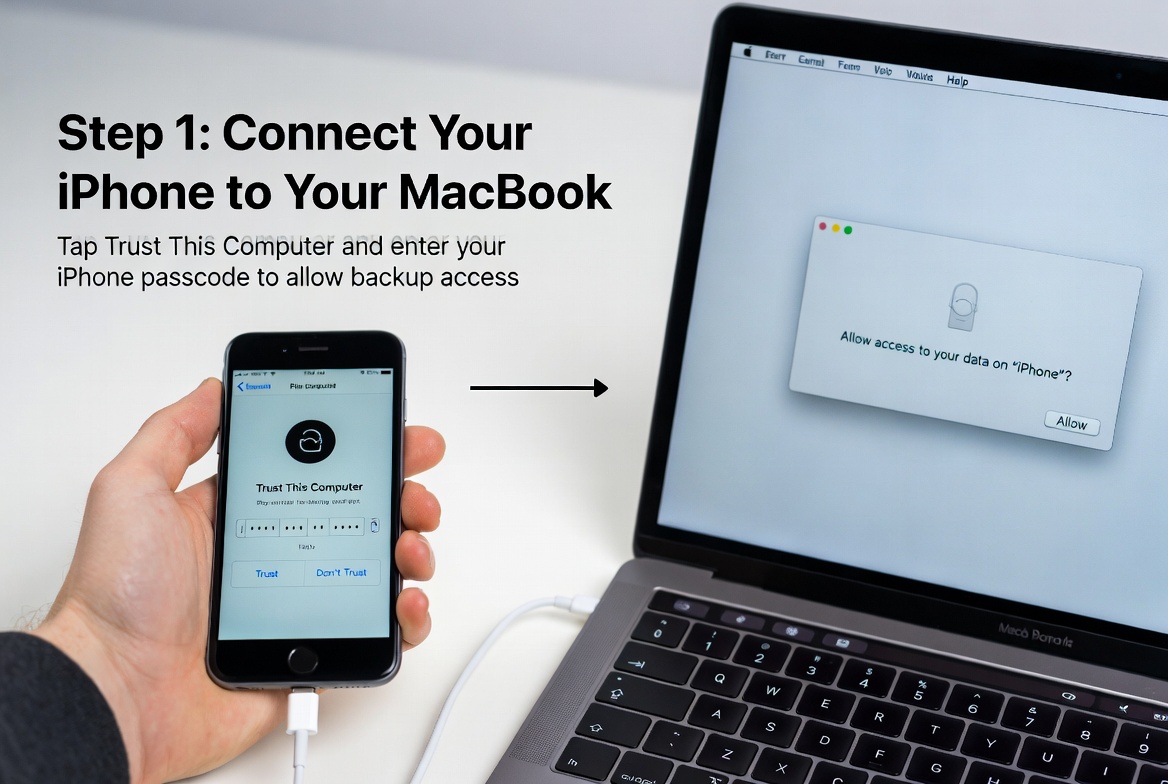
Step 1: Connect Your iPhone to Your MacBook
Plug your iPhone into your Mac using your cable.
If your iPhone asks:
-
Tap Trust This Computer
-
Enter your iPhone passcode
This is required so your Mac can access your iPhone data for backup.
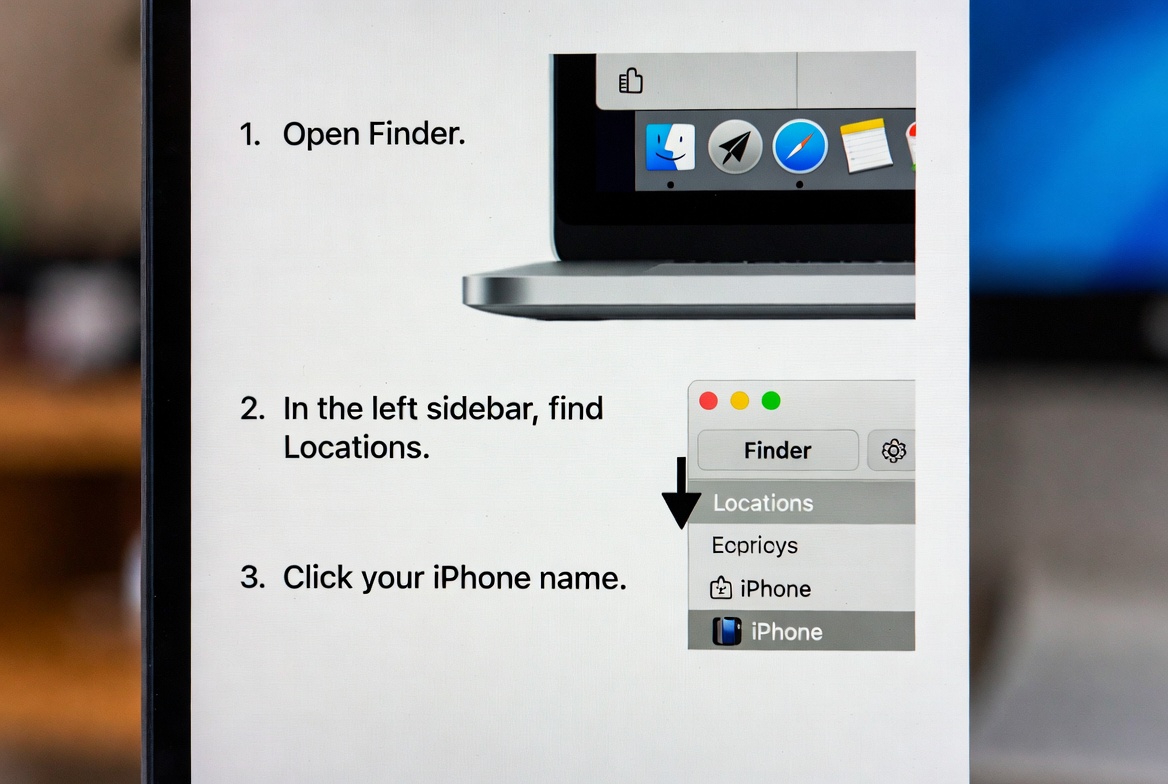
Step 2: Open Finder and Select Your iPhone
-
Open Finder
-
In the left sidebar, find Locations
-
Click your iPhone name
You’ll now see your iPhone’s summary/settings screen in Finder.
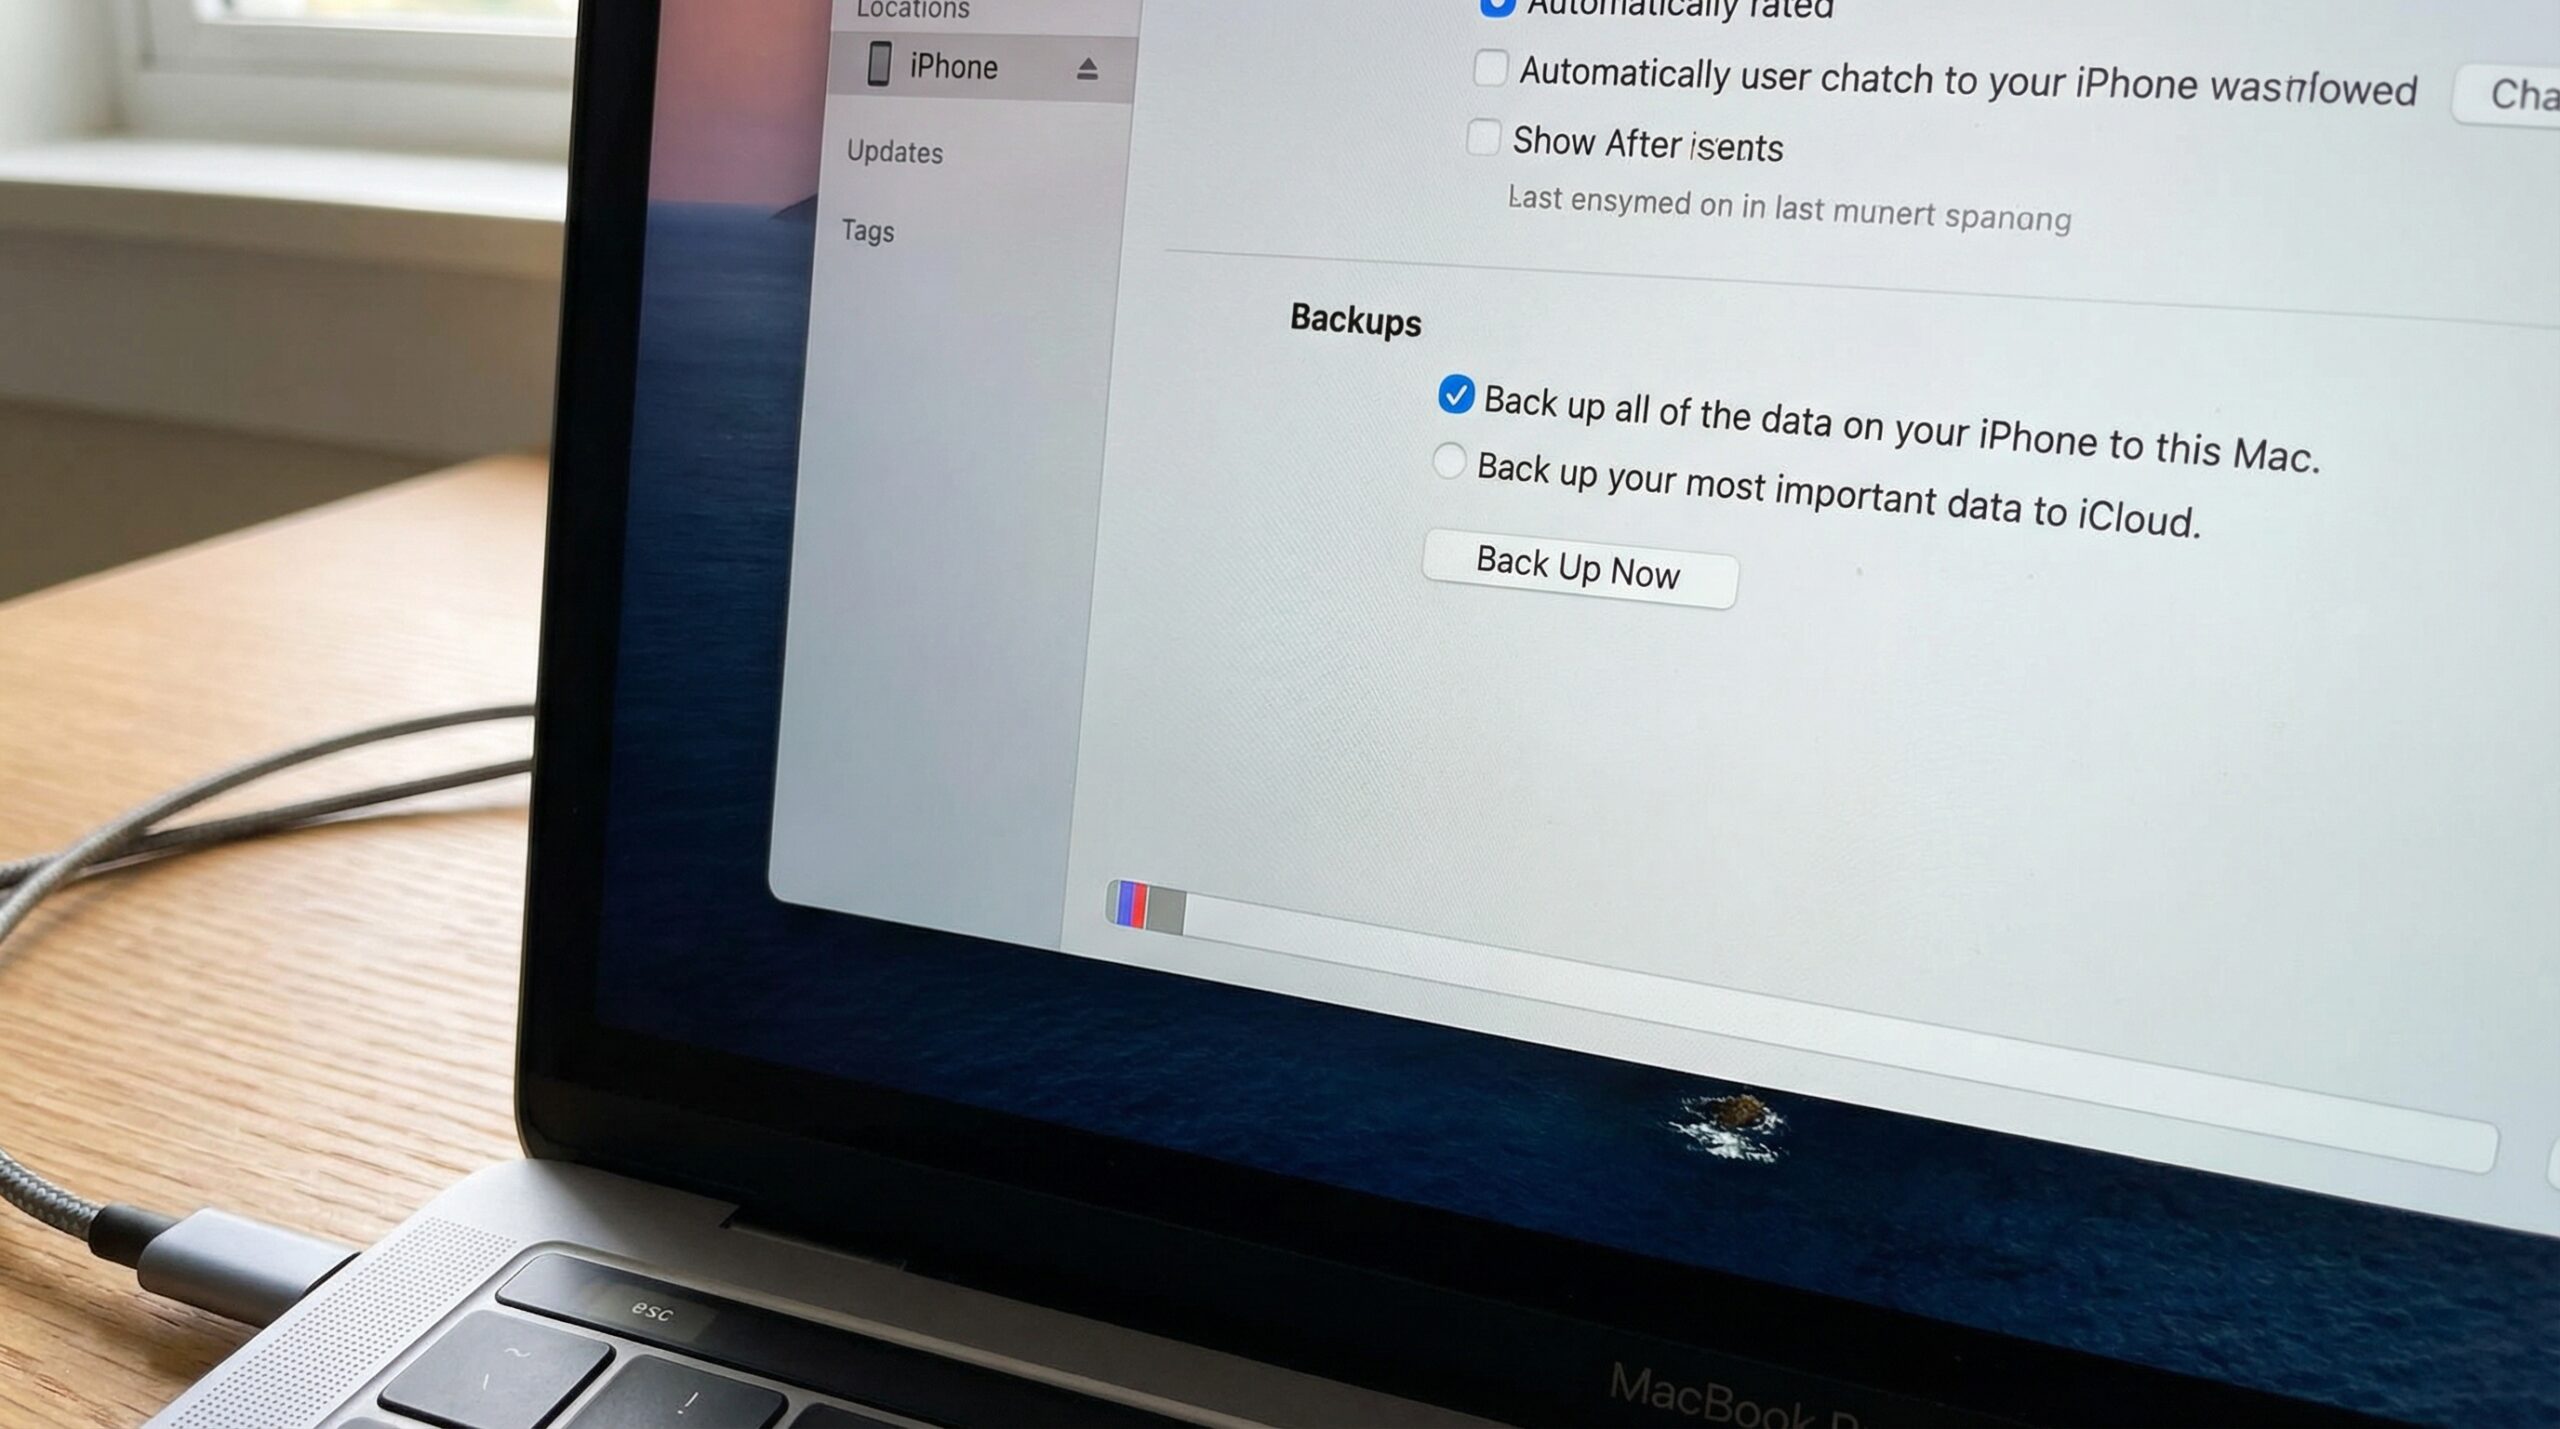
Step 3: Select the Correct Backup Option
Scroll to the Backups section and choose:
✅ Back up all of the data on your iPhone to this Mac
This ensures your iPhone data is saved locally to your MacBook.
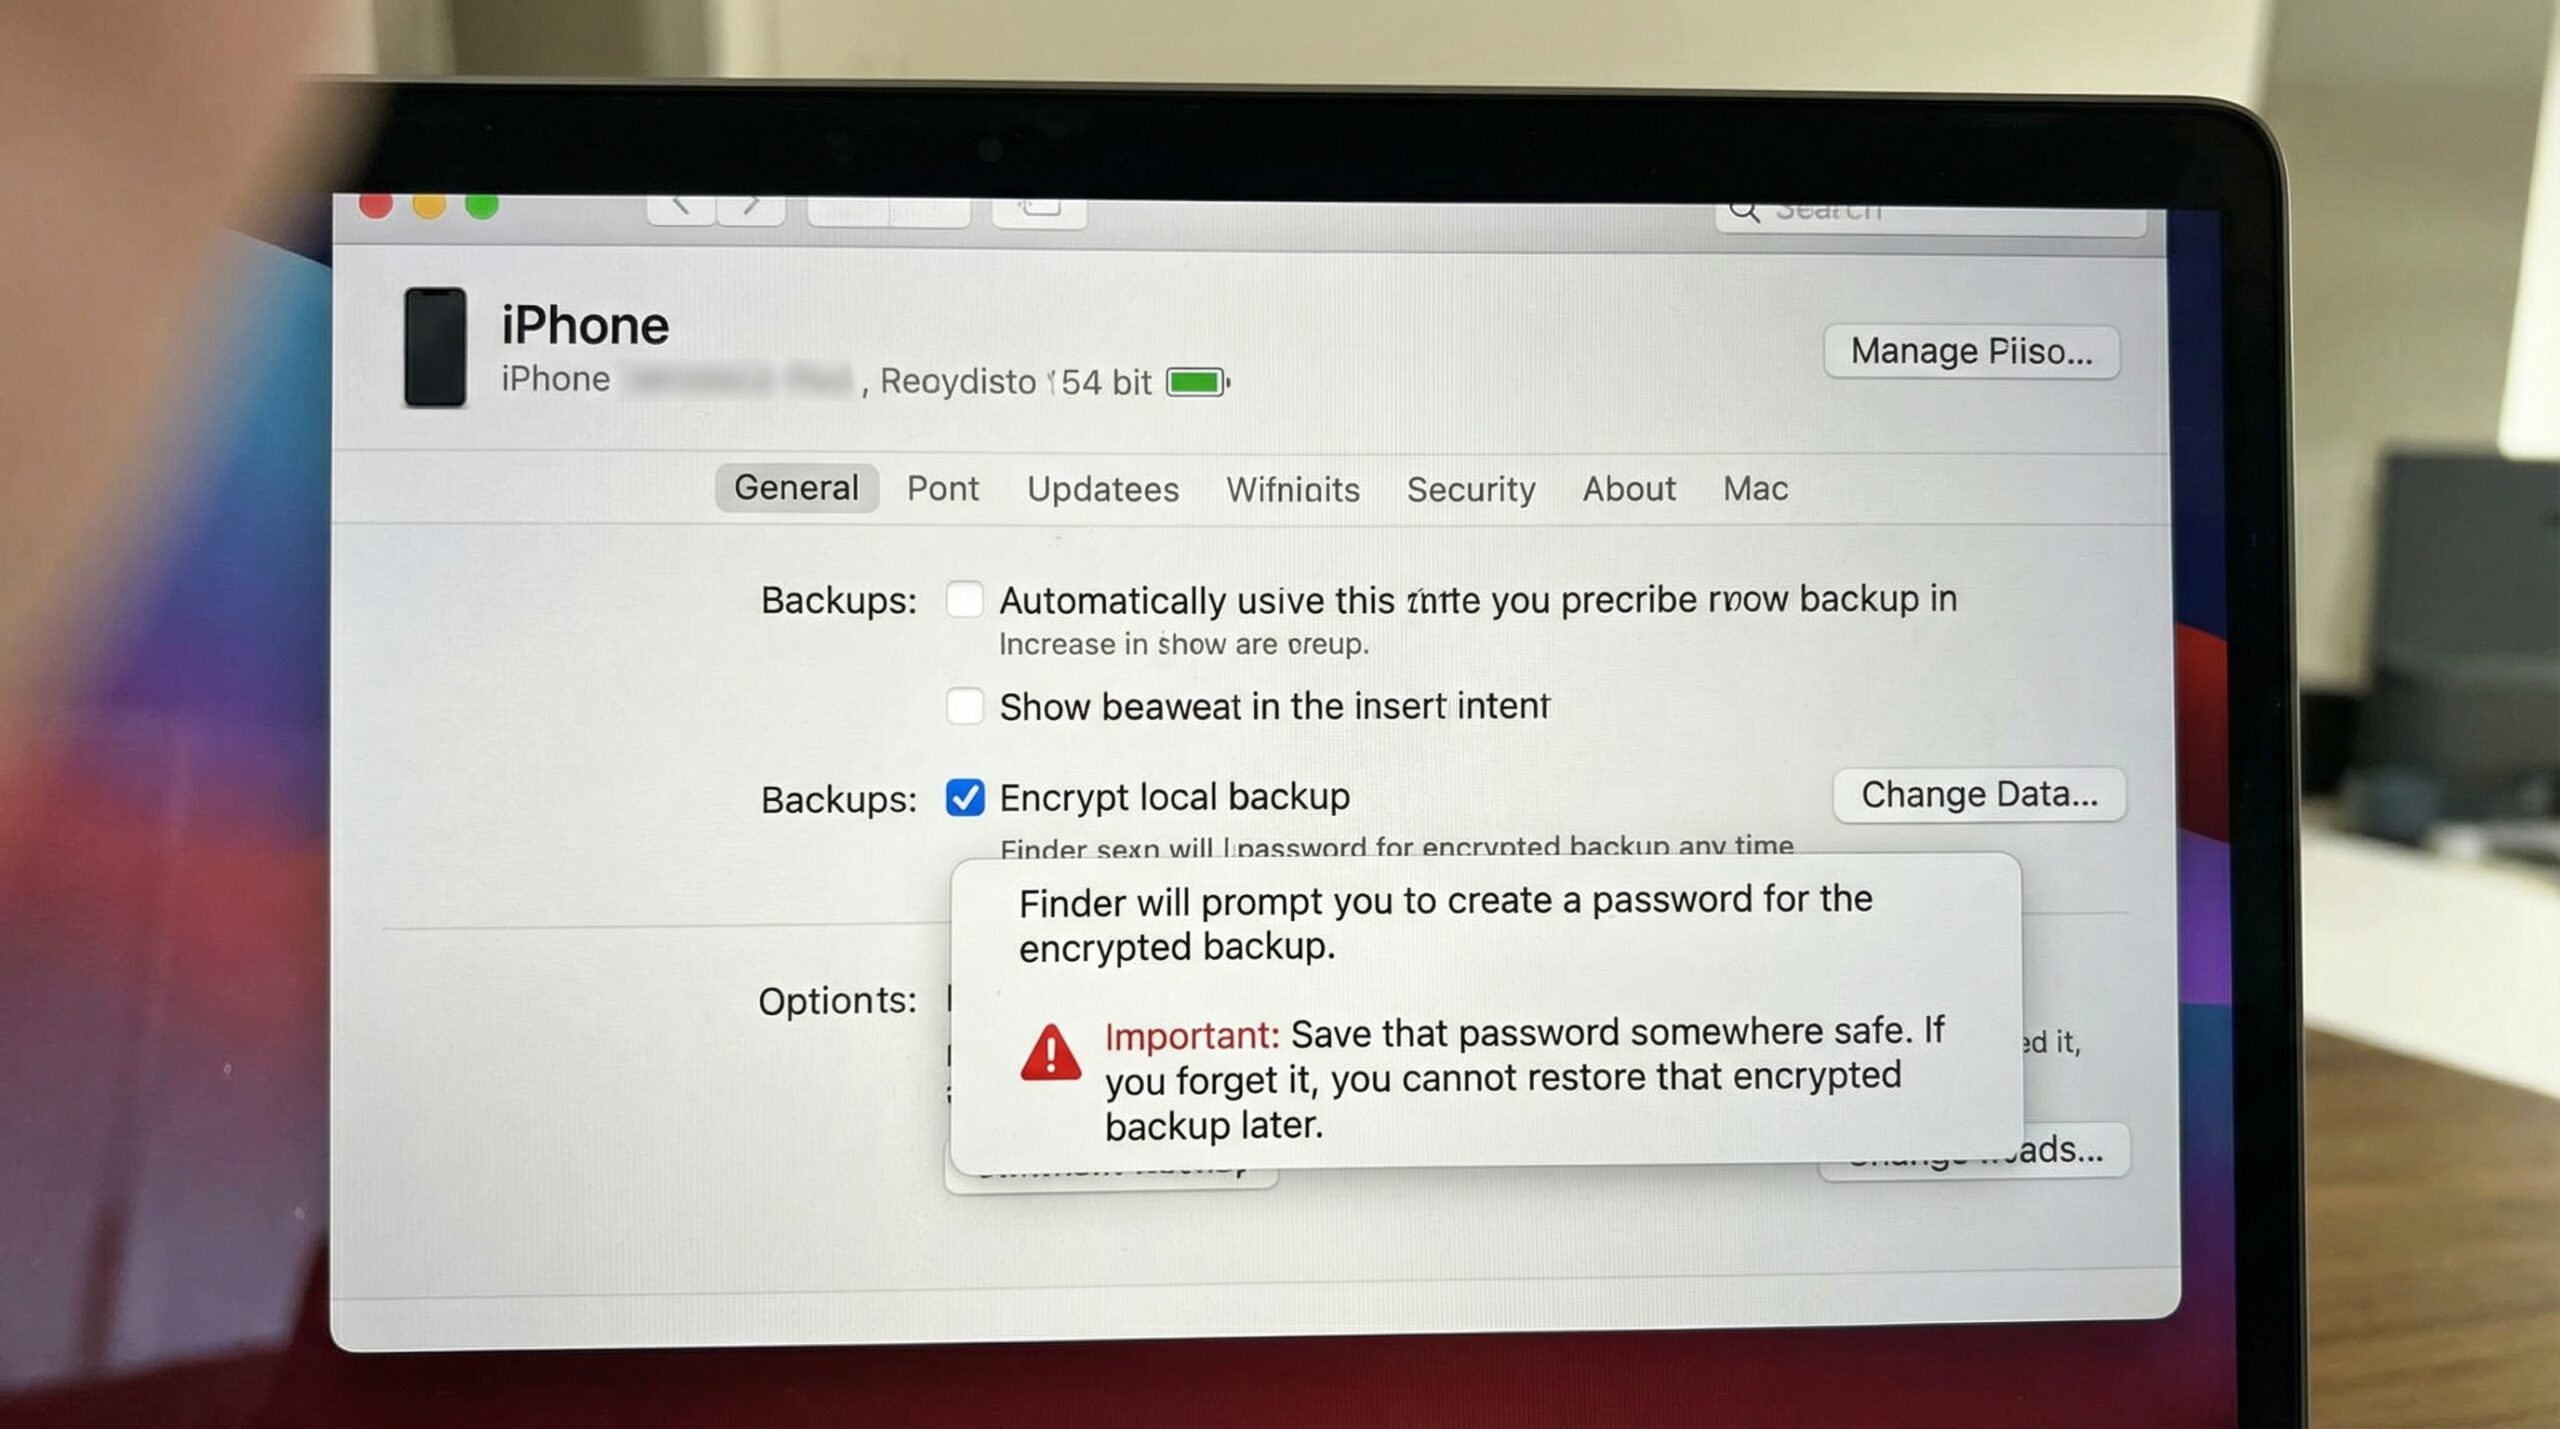
Step 4 (Recommended): Encrypt Your Local iPhone Backup
To include sensitive data like Health data, saved passwords, and Keychain, check:
🔒 Encrypt local backup
Finder will prompt you to create a password for the encrypted backup.
Important: Save that password somewhere safe. If you forget it, you cannot restore that encrypted backup later.
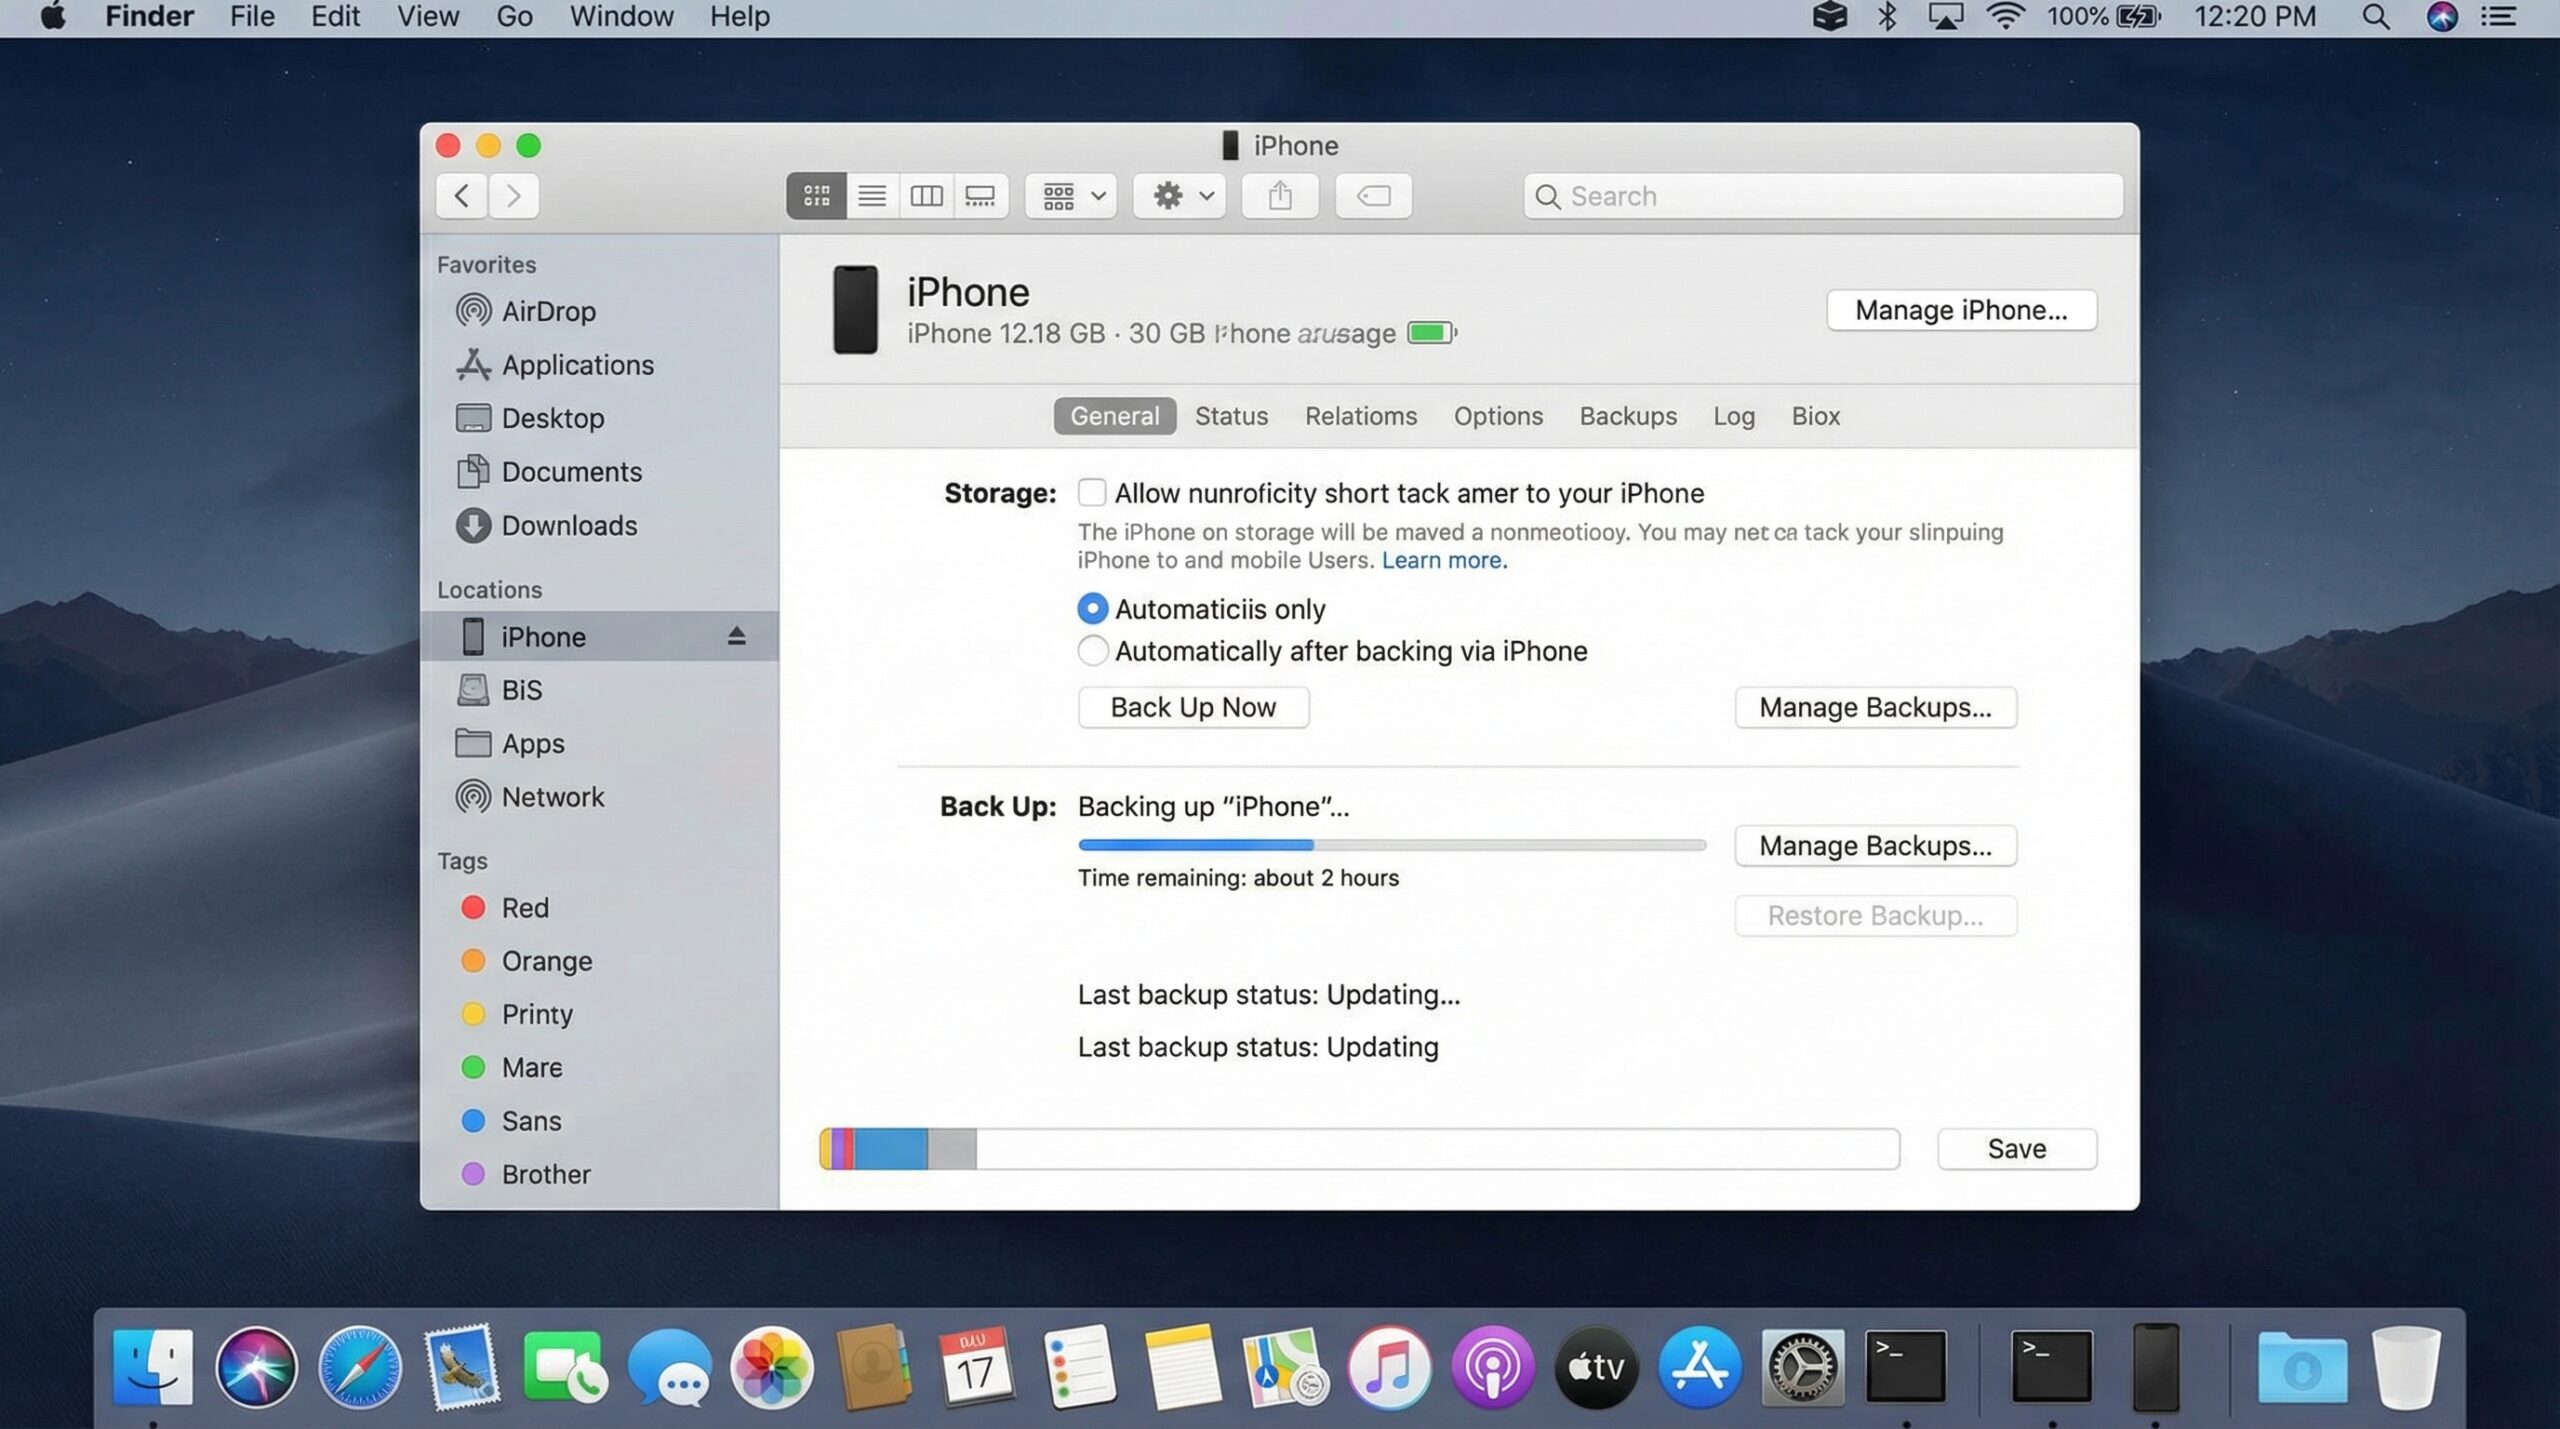
Step 5: Click “Back Up Now”
Click Back Up Now to start the process.
Finder will show a progress indicator. Backup time depends on how much data is on your iPhone (photos/videos typically take the longest).
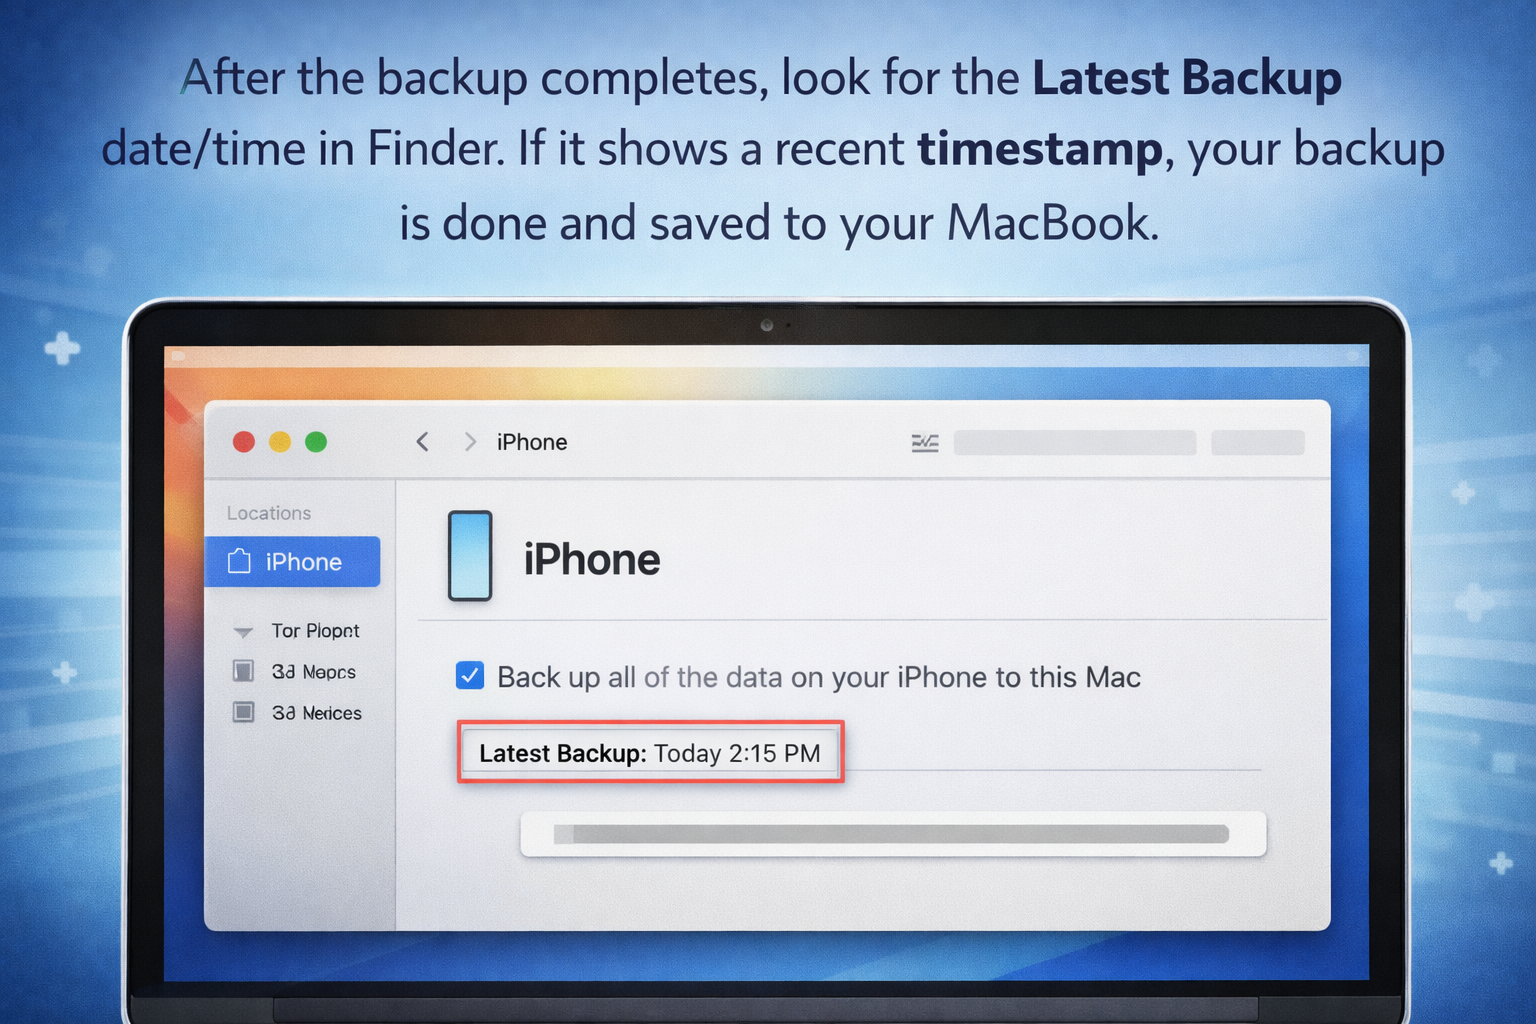
How to Check If Your iPhone Backup Was Successful
After the backup completes, look for the Latest Backup date/time in Finder. If it shows a recent timestamp, your backup is done and saved to your MacBook.
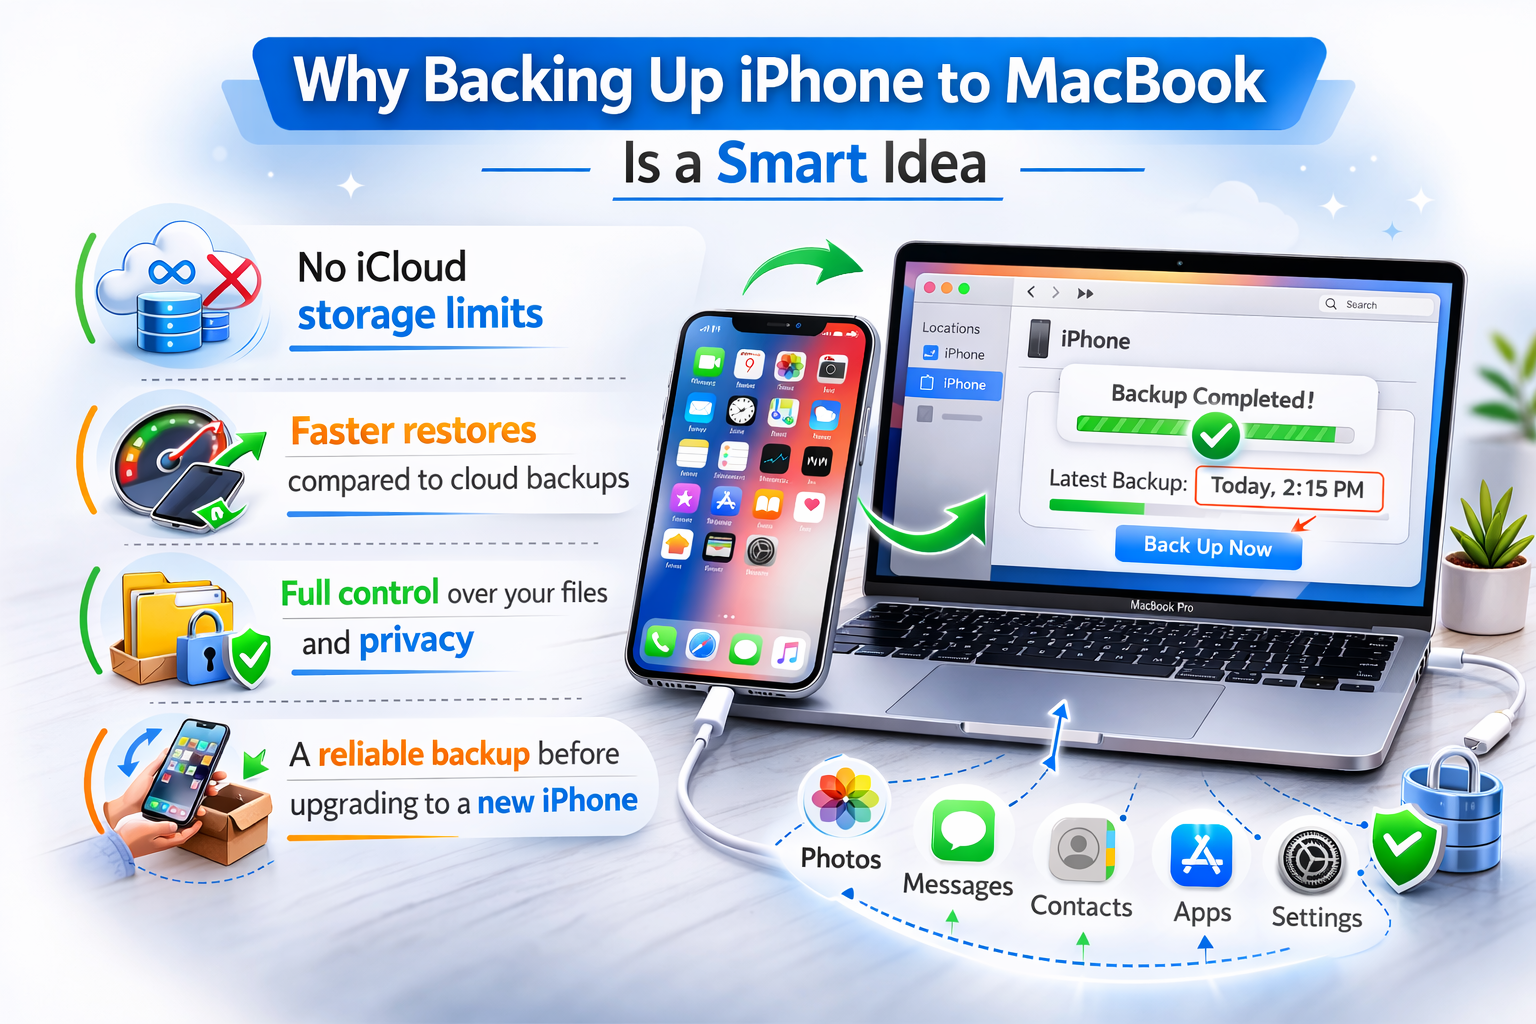
Why Backing Up iPhone to MacBook Is a Smart Idea
A local Finder backup is ideal if you want:
-
No iCloud storage limits
-
Faster restores compared to cloud backups
-
Full control over your files and privacy
-
A reliable backup before upgrading to a new iPhone
Common Problems (Quick Fixes)
iPhone Not Showing in Finder?
Try these:
-
Unplug and reconnect the cable
-
Unlock your iPhone and tap Trust
-
Restart both the iPhone and the Mac
-
Try a different USB port or cable
Backup Taking Too Long?
-
Large photo libraries can slow down backups
-
Close heavy apps on your Mac
-
Keep your iPhone connected and awake (screen unlocked helps)
FAQ: iPhone Backup to MacBook
Does Finder backup include photos and messages?
Yes—Finder backups typically include most iPhone data, such as photos, messages, contacts, settings, and app data (depending on the app).
Should I encrypt my iPhone backup?
If you want your backup to include passwords and Health data, yes—encryption is recommended.
Where is the backup stored on the Mac?
Backups are saved locally on your Mac’s storage. You don’t need to manually access the folder for most users—Finder handles it.
Final Thoughts
Now you know exactly how to back up your iPhone to a MacBook using Finder—a fast, secure, and iCloud-free method that’s perfect before upgrading or resetting your device. Make it a habit to back up regularly so your data stays safe no matter what.
Ready to upgrade your Apple gear? Visit Techable.com to shop MacBooks, Apple Watches, and more. Compare deals, explore bundles, and buy Apple gear hassle-free.

0 Comments